Showing posts with label resist method. Show all posts

Friday, July 29, 2016

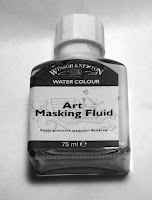
MASK UP WITH MARVELOUS MASKING FLUID

Resist fluid is a favorite of mine that works
well with fluid acrylics.
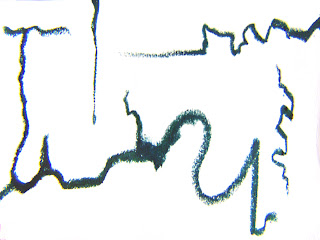
Here's a finished example, below, and I'll provide the steps (and some pointers) below that!
art+blog, acrylics, how-to
After the latex was removed, I painted parts of a few exposed lines.
Resist fluid makes an exciting addition to any painter’s resources.
painting

I didn’t have a Fineline Resist Pen at the time, so I applied lines and dots with a painting knife. Always apply this product to dry paper! The latex rubbed right off my knife when I was finished.

Other application tools you might use include wooden skewers, toothpicks, old (bad) brushes, even dip pens. Most resist fluid doesn’t thin with water, but you could try ammonia.

If you make a mistake, just let the masked line dry and remove from the paper.

ART TIPS: Don’t try drying the masking fluid design with a hot hair dryer! (But don’t leave the fluid on absorbent paper for a very long time. Also, masking fluid becomes gummy if you leave the cap off too long.
painting, how-to, mask, resist
Let the fluid dry before you go to the next step!
When my mask was dry, I painted with watercolors, although fluid acrylics are fine. (Granulating medium made the gray areas more interesting.)
You MUST let your painting dry well before removing the masking fluid! The latex can be removed with a rubber cement pick-up tool, but I just rub a finger over the masked lines and shapes.
I wanted to color some of the white lines,
so I used blue at right and left edges.
But do leave some white, darn it!
The original white paper will
make your painting sparkle.
 
 THANKS FOR VIEWING THIS POST!

Monday, March 21, 2016

GOUACHE RESIST? AN IFFY OUTCOME BUT QUICK FUN!

I've always used this technique with tempera paint, happily. See white-tempera-resist for a similar example. Never tried it with gouache, which is somewhat comparable to tempera, and never tried it with a portrait as subject matter. My results were mixed, but the mixed media method was fast and a pleasurable process. It's always exciting to see what you get!
MATERIALS:
  • Pencil
  • Watercolor paper
  • Brushes
  • Gouache (or tempera!)   
  • India ink
  • A sink                                
    how-to, tutorial, resist
    My very light pencil sketch,
    made darker here for contrast.
I used a hard pencil on an excellent hot press paper, about 8 x 11" and heavy weight. I didn't need to tape it down, but if your (absorbent) paper is lighter, do tape it to a board.


The next step is to block in a flesh tone.

technique, Guhin
My girl ends up a bit goth later.
IMPORTANT: Wherever you want to save white, apply white paint! Be generous with your highlights. The whites and highlights of the eyes, tops of cheekbones, a bit on the nose, chin, forehead, even in the hair.
resist, technique, tutorial
NOT finished yet, and creepy too!

I also used blue-violet for shadows. My gouache was a cheap brand, and I likely didn't apply it thickly enough, but you should! Thicker the better!
TIP: Remember that you cannot layer any paint colors, since the first tone you paint on the paper is the one that will show later.
LET THE PAINT DRY.

Finally, gently apply waterproof India Ink over all, without scrubbing. Not showing that step, because, you know, who wants to see that? Protect your work area, your hands, your clothes, and use a wide, soft brush. LET DRY!

This final part's a blast! Rinse off the black ink under lukewarm water. Here's the big reveal, and I hope yours turns out happier than my sad girl! But do see below for other ways to improve a semi-successful piece.

portrait, MixedMediaManic
My end result: no red, very little blue, darn it.
TIP: Correct mistakes with white or black paint after the final is dry.
AND you can even add other colors after the fact, as I did with my
previous tempera example.

mixed-media


Sunday, January 17, 2016

MORE IDEAS, TECHNIQUES, & MIXED MEDIA ADVICE

texture, mixed-media
Texture: A good way to break creative block is to collage rice papers and paper scraps onto heavy watercolor paper with matte medium. See the example above. After it's dry, use pastels, pencil, watercolor, acrylics, or whatever you wish to finish the piece!
 
Love those old wallpaper books!:
Ask for old swatch books free from the paint store, and use the vinyl samples as a support for various media. Oil pastels are great because you can layer and sgraffito the pastel and enjoy a bit of the background pattern showing through. See below.
tips, techniques
Oil pastel over vinyl, then scratched through.


art+blog, mixed-media
They DO look like china flowers!
Make your own “porcelain” flowers:
Believe it or not, these “porcelain” blooms are fabric flowers dipped in tinted plaster of Paris!
 
tips, mixed-media


 A cool technique with acrylics:
See my own above! I plan to use this cut up into pieces!
Create interesting backgrounds with rubber cement, to keep certain areas white. First, apply some rubber cement and let it dry, paint a color and let dry, apply rubber cement in an interesting pattern and let dry.  Do again with another color. When that’s dry, pick up or rub off the cement across the entire piece, and see what is underneath.
(I did the one shown above 4 or 5 times on a single white surface, and needed elbow grease to remove all the rubber cement!)
 
Lefties:
For left-handed artists...turn your spiral bound sketchbook upside down and work from the back of the book. The spirals will be on the right side and not interfere with your hand.
 
A fun exercise to motivate you:
When you need inspiration, try the two-hand method. Pick up a different-colored marker or colored pencil in each hand and draw something—or nothing! Move both hands at the same time, alongside each other in a similar pattern. You'll be amazed at what your non-dominant hand can produce. A great warm-up tool.

mixed-media, tips, techniques


Monday, December 14, 2015

Two Examples of Fabric Resist

Fabric Fun Made Easy!
We've said it before, working the resist technique can be COOL, whether on canvas, paper, or other fabric. See links below to MORE posts with MORE resist methods!

Resist, technique, Mixedmediamanic
Blue school glue on washed cotton fabric.
Let the resist material dry before washing colors
over the design. Then wash the school glue out after the permanent paint or ink dries!

Thin tar gel
If you want to try this
with kids, fluid acrylic
medium can be used
(with paint shirts on!).
Intense, vivid watercolors
are a good substitute for
permanent colors.

I luuuuve this tempera resist project, below: http://mixedmediamanic.blogspot.com/2015/08/white-tempera-resist.html
and this one, too! http://mixedmediamanic.blogspot.com/2015/04/more-techniques-with-citrasolv.html

Our recent contest was won by jusaweecatnap, who should kindly and privately email me with her postal address in order to claim her prizes!

MY THANKS TO ALL OF YOU WHO VISIT THIS SITE! HAPPY HOLIDAYS.

Wednesday, September 23, 2015

TWO COLLAGES WITH FRUIT

Colorful images of fruit are so tempting...I used
the idea not once but twice!
The first one shown below includes countless pictures carefully cut from magazines. I worked across the page, using analogous colors as well as I could, from yellow-green to yellow, yellow-orange to red, and finally red to violet. (Kind of a horizontal color wheel, but not exactly.)
mixed-media
Private Collection
This next work is a painting - collage with a resist effect in the background.
P.Guhin, mixed-media
Clear gesso resisted the wash of acrylic paint.


Saturday, August 22, 2015

WHITE TEMPERA RESIST

I've done many posts about various kinds of resists (glue, soap, wax, and more). This is one of my favorites!
The process appears in four photographed steps in a book I co-authored, Painting with Mixed Media. 
Guhin, painting
It's really a beautiful book.
First, use heavy white paper. A smooth, thick watercolor paper is wonderful for this.
If you wish to sketch your design first, do so very lightly in pencil.
 
Next, use thick white tempera paint, applied wherever you wish the finished work to be white. (It's a challenge at times to only paint in lines and shapes in reverse, so to speak, since most of us are so used to working with darker lines first. But stick to highlights and lighter areas with the white tempera.)
 
Thirdly (is that a word?!), when the white tempera is dry, cover the entire piece with a coat of permanent black India ink. Apply it gently with a wide brush and let dry.
 
Lay the paper into a sink of cold water and gently sponge it until the tempera paint lifts off, taking the black ink with it. You're left with a black and white design reminiscent of a woodcut, perhaps.
 
This example was enhanced with washes of watercolors, but you can use inks, thinned acrylic paint, or pastels to add color if desired. 
Guhin, resist, tempera, project
Simple, but I loved the process!
Guhin


Sunday, September 7, 2014

EASY IMPRINTING OF WATERCOLOR OR LIQUID ACRYLIC

TWO SIMPLE TECHNIQUES!
 
The first method uses plastic shapes cut from shopping bags. I made boulder-like forms by wetting watercolor paper, placing the plastic shapes firmly down on the damp paper, and painting washes around them.
Let dry before removing the plastic. Then develop the painting further. See mine below.
how-to, imprinting
I have a video of making this on YouTube!
The next technique is also a resist method for imprinting a painting. I wanted a garden-y, trellis-y effect for a painting with leaves.
Fold waxed paper, open it up again, and lay it into a wet wash of vivid ink or fluid paint. Press it down with a sheet of glass on top. Let dry before removing the glass and the waxed paper.

technique, mixed-media
Waxed paper texture at work! Folded examples at right.


Embellish and make marks as desired to
achieve the effect you want!
mixed-media, P.Guhin
This is a detail of the finished piece.


Thursday, July 17, 2014

WINNER ANNOUNCED, AND BLASTS FROM THE PAST!


The name chosen from the hat (actually a bowl!) to win the free art book, Creating Decorative Paper, was Geri deGruy! My thanks to the others who participated, and I encourage them to please try again...I'm planning another giveaway even as we speak.

One section of that book concerns resists of many types. I've discussed them here before, and love to incorporate them into my mixed media work. Clear tar gel on absorbent paper can produce fantastic results if you let it dry, then wash vivid color over the area.
wash, how-to
Can you see the fish shapes?
 Here's the original post.


Wax resist is another simple, easy method: In the butterfly example below, I used waxed paper. The tutorial is here.

tutorial, method
I adore these colors!


P.Guhin
I used a fabric resist material here.
See the original post!


Sunday, May 18, 2014

IMPRINTING: A GREAT WAY TO ADD VISUAL TEXTURE!

USE FLUID PAINTS TO TRANSFER PATTERNS

(P.S., The winners of yesterdays's giveaway were Gil in the UK and Susie! Congrats to them.)

The imprinted paper shown below was done with damp watercolor paper, a sheet of glass, and a crocheted piece. I pressed the lacy fabric to the paper before flooding it with intense watercolor. Then I quickly put the glass on top and a heavy book on that! The next day I removed the "sandwich."

method, how-to
Not a finished work, but paper to be used in collage - mixed-media.


For the "fishy" painting, I cut a plastic bag into curvy shapes
(see the light, fish-like forms below) and lay them on the damp
paper first. They stuck there and formed a type of resist. You could
also use shards of glass or Plexiglas.
texture, tutorial
I used a fishnet...how appropriate!

Sunday, July 21, 2013

OIL PASTEL AS A RESIST WITH WATER-BASED PAINT

Traditional oil pastel (not the water-soluble kind) 
acts as a resist with watercolors, liquid acrylics, 
thinned tempera or gouache.

I used good, smooth watercolor paper and applied the oil pastel heavily in the line design seen below.
art tutorial, how-to
Yup, this is a simple resist demonstration!


Then I washed in some diluted gouache.
resist painting
I added a few white accents later.
Thanks for viewing this post, from the mixed media manic herself!

Saturday, December 22, 2012

HOW TO USE THE RINSE AID TECHNIQUE


CREATE A COOL EFFECT WITH AN EVERYDAY DISHWASHER PRODUCT!

MATERIALS AND TOOLS:
  • acrylic (or watercolor) paint
  • water
  • paintbrush
  • canvas or paper
  • dishwasher rinse aid
  • rags
  • gel medium (optional)
  • squirt bottle (optional)
This lesson will show you an easy how-to, and you can use the effect you get as a cool background! 
Or you can do it on paper and use the dry paper later in a collage project.
  1. Cover the canvas or paper with acrylic paint in the color of your choice, to seal the surface. (You can also seal the surface with gel medium.) Let dry. 
  2. Select a contrasting paint color (much lighter or darker than the first) and thin the acrylic paint with water. 
  3. Apply the thinned paint quickly, and while it is still wet, drip the rinse aid into it.
instruction, advice, tips
Beginning the rinse aid technique

Note: You can use a thin brush to draw rinse aid lines, or make large spots of the rinse aid run by tilting the paper or canvas. You can even saturate a sponge with rinse aid and stamp it onto the wet paint.


The effects you get might be satisfying this way (especially with watercolors!), but here's another tip: Use a damp rag or paper towel to wipe off the surface.


technique, tute
Example of  the technique using acrylic paint on mixed media paper

More advice? If you aren't happy with your results, repeat the process with a third color of acrylic paint!

Experiment with different color combos on a variety of surfaces. 


The example below was done with watercolors.

tutorial
Spray the paper with water first for best results.

Saturday, August 6, 2011

Using Paste Wax as a Resist

I painted a metallic peachy color on watercolor paper using acrylics first. When that was dry, I applied regular ol' Johnsons Paste Wax in swirly shapes. Then I painted more acrylics in two other colors and allowed them to dry. Finally I wiped off the paste wax and admired my newly-decorated paper!
Now for a shameless plug: Watch for my book called Creating Decorative Papers, to be published by Stackpole in 2012!


                                                                       Brought to you by 

Friday, July 8, 2011

DRAWING GUM MAKES A GORGEOUS PATTERN!


This design on paper was SO000 easy to do, and it looks rather striking, yes? I used plain old manila paper (sort of yellow-tan).
Drawing gum is a masking fluid. I put a blob of it on the paper and blew it around through a drinking straw. Thus the branching lines.
When a few moments had passed, I gently washed with blue watercolor (dye would work, too), over the entire page. It turned greenish on the yellowish paper.
After that was dry, I rubbed the drawing gum off with my thumb. 

Tuesday, June 14, 2011

MAKE YOUR OWN COLLAGE PAPERS WITH GOLD LEAF AND MORE!

To make my first example, I used a deli paper page I'd previously decorated with water and alcohol inks. I applied gold leaf to it (which looks brownish here).


Then I painted here and there with a glaze of orange acrylic paint.


For the next project, I first applied crackle medium to rigid paper, let it dry, and then painted it with acrylics. It looks rather nice this way, I think. But that's not all!
The gold leaf I added (after the paint was nearly dry) is an elegant counterpoint to the rough, crackled surface.


Saturday, March 26, 2011

HOW TO USE CLEAR TAR GEL AS A RESIST MEDIUM

1. Paint, stamp, or drizzle tar gel on absorbent, DRY paper. Here I'm using good, heavy watercolor paper. I could have painted it with light colors first if I had wanted to. You definitely should, for added interest!


2. When the tar gel is dry,
wash over it with
watercolors or any waterbased, diluted paint or ink. Here I also used non-permanent markers and added black accents with a pen.


Thursday, December 9, 2010

Don't You Just Hate It When That Happens?

OK, this posting isn't all about mixed media art. And I'm not a hater. Really. But don't you just hate it when someone says "further" (for distance) when they should say "farther"? Maybe it doesn't bother you, and I understand that. But don't you just hate it when...
  1. The little skirt on the "Women" restroom sign is so small that the figure barely looks different from the figure on the men's room?
  2. Even in a retirement community, some of the popular "kids" still bully the others?
  3. Physicians and nurses, who should know better, are unhealthily obese? And they're YOUR doctor and his/her nurse?
  4. You forget a person's name or the name of an object, and these are words you've spoken a thousand times before?
  5. You've been standing at the end of a long line forever, only to have another customer walk up and nab first place at a newly-opened register?
  6. The sight of an older, unattractive man with a hot wife makes you think, "He's got money." ?
  7. The slow, SLOW driver ahead of you makes it through the yellow light but then the light turns red?
  8. The only birthday cards you get in the mail are belated ones?
  9. We never learn from the past; we just keep sending our boys off to war?
Lesson on Glue Resist


This colorful example is on dyed paper, but you can try it on printed papers, textbook pages, gift wrap, or whatever your creativity leads you to use.
When/if the paper is dry, simply squeeze out white craft glue, fabric glue, or any acrylic medium that dries clear. Dribbling tar gel works very well. Make organic lines and shapes with the glue, or create a geometric design, or write words and symbols.
Allow that to dry, and wash over the entire page with a thin coat of paint in a contrasting color.
Okay, so my finished page turned out hideously ( don't you just hate when that happens?) and I am not showing it here, but I'll bet yours is better!

Saturday, September 4, 2010

Wax Resist with a Common Household Product

Waxed paper can be cut into shapes, placed onto plain or painted-but-dry paper, and pressed with a clothes iron. Use a pressing sheet that you don't mind getting melted wax on.
Then paint over the paper again after the wax has cooled. Easy-peasy! In the example above, the upper right butterfly is actually the waxed paper, and the lower butterfly is the wax resisted one.

Saturday, July 24, 2010

Fabric Resist Medium on Paper

There are many types of fabric resist products on the market. Some wash out and others are quite permanent. This example was done with the former type, and I must add that washable school glue,
 the clear blue type, works too! I guess the white school glue would do as well, right?  
After the fabric resist design sat on the paper overnight, I washed over it gently with fluid acrylics.
After THEY were dry, I washed out the tacky resist material.