Showing posts with label art papers. Show all posts

Thursday, July 2, 2020

SALE! GET THIS AWARD-WINNING ART BOOK (NEW! Never used!) FOR CHEAP ON ETSY!

HOW-TO FOR BOTH ADULTS AND KIDS!
HUNDREDS OF FULL-COLOR PHOTOGRAPHS TO INSPIRE YOUR CREATIVITY.
Use the many techniques and ideas in your own mixed media art, journaling, even for scrapbooking.
My Etsy shop is called guhinp, and here's the link to the book:
 

Thursday, April 2, 2020

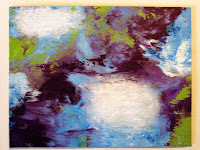
MIXED MEDIA COLLAGE - PAINTING ON CANVAS

I WOULD LOVE A NIFTY TITLE FOR THIS NON-OBJECTIVE WORK.

GOT A TITLE SUGGESTION 

FOR THIS NEW, MIXED-MEDIA WORK?

STEP-BY-STEP FROM SKETCH TO FINISHED PROJECT

MY ORIGINAL SKETCH...I thought it would be horizontal!

I wanted a limited color scheme of cream, light and dark gray, and cool red in a variety of values. I used acrylic paint, textured papers, my own decorated papers and more.

The photo shown below is in progress.  I goofed by leaving a very dark area in the center.

At this point I hadn't yet decided to finish the piece as if it would hang vertically.
The finished work.

Note (above) the several small, brighter accents as focal points. 

Please comment if you have a good idea for a name for this. 

Or if you like it!   THANKS!

Saturday, October 12, 2019

I'm Back & Painting, Playing with Mixed Media, Creating Assemblages & More!

 Holbein inks and Sennelier shellac-based inks are fun to work with. I wanted to create some cool collage papers with them.
 
The 13 Holbein drawing inks are waterproof and come with droppers in the screw-on tops. Some are transparent, some opaque.
Sennelier shellac-based inks have a transparent, satin finish and thin with water, if you can believe that!

For the first example shown below, I worked on acrylic paper from a pad, spraying a little purple fluid acrylic from a spray bottle. Then I used the applicator tip of the Carmine color of Holbein ink. It's a powerful pigment! Then I let that dry.

tute, tutorial, how-to
I actually liked this first step better than the result later.
Next, I created a few puddles of rubbing alcohol and added alcohol ink. The effect, shown below:
Guhin, blog
I do like the colors together.

Thanks for viewing Mixed Media Manic!
 
(Full disclosure: This post is derived from a much earlier one. And new stuff is coming, I promise.)

Friday, June 3, 2016

Rainy Day Blues: Other Kind Artists' (work that I love!)

Blue has always been one of my fave colors...you gals out there will understand when I speak of a vivid blue dress I had as a kid. Loved that dress to pieces!
Guhin, art+blog
This is titled Ignorance. Isn't it great?!
The mixed media piece above is by Meera Rao, a very talented artist. See her blog at http://artbymeera.blogspot.com/search?q=ignorance

This fantastic collage, below, is by Lynn Edwards. Find more of her well-designed work at https://lynnedwardsart.blogspot.com/

art+blog
One of Lynn's Boho series (all terrific!)
The sculpture is by Empress Wu, a gifted gal by the name of Wilma Simmons, and is part of a series. This one is Perseverance. The exterior  "walls" are gesso painted fabric, with layered gauze, newspaper, and tea bag paper, amongst other media and techniques. I admire her work very much!
Guhin, art+blog
http://empresswu.blogspot.com/
My gratitude to the wonderful artists who allowed me to show some of their "blue" works! You women are the greatest! (I almost said girls, but, you know.)


Tuesday, March 1, 2016

NO TIME FOR ART? BULL CRAP!

Here's another stab at a simple, grid-like
collage using up some of my
huge stash of painted papers.
I do prefer my earlier, very vivid example, shown at the link here, but this time I wanted to try a neutral collage with tan, beige, white, brown, black. As you can see below, I did not stick with the plan. That happens quite often!

art, project, Guhin
Use wallpaper, wrapping paper, old letters,
book pages as well as your own original papers.
I had also intended to further develop this work with stamped and scribbled additions, but nooooo. Go figure.
As my friend Lynn says, this could be a good warm-up exercise. Or a preview to test a composition!                
Thanks for your viewing! 

Monday, February 8, 2016

USE UP YOUR PAINTED PAPERS IN A PATCHWORK COLLAGE

You have them...you know you do...saved pieces on which you experimented, or scraps from failed works. Maybe you even keep papers on which you've tried out colors or wiped your brush!
This tutorial describes my own, simple method for creating a quick collage. Use it as fun inspiration, motivation, as a lesson for kids, or perhaps even to make a serious finished artwork! You can also add mark-making if you feel some areas need more. OR you might borrow from the finished design to compose a painting!


tutorial, how-to
A "Primary-ly" red, yellow, and blue color scheme.
1. Go through your stash of your own, original decorative papers. You might already have a color scheme in mind...I did! Gather them together, and check to see if you've included a full range of values from near-black to white. TIP: No need to stick with brights, as I did...all neutrals are terrific for this. Or complementaries like orange and blue, or whatever grabs you!
collage, tutorial, MixedMediaManic
Not a collage, just a sampling of papers, but I sorta like it.
2. I went with cut edges and geometric shapes, although torn, organic shapes work too. Aim for a variety of sizes (and shapes). Arrange on a sturdy support and audition a number of compositions before gluing anything down. Strive for balance! And unity! Are there some similarities and some differences? Is the finished collage harmonious? HAVE FUN!


Sunday, January 17, 2016

MORE IDEAS, TECHNIQUES, & MIXED MEDIA ADVICE

texture, mixed-media
Texture: A good way to break creative block is to collage rice papers and paper scraps onto heavy watercolor paper with matte medium. See the example above. After it's dry, use pastels, pencil, watercolor, acrylics, or whatever you wish to finish the piece!
 
Love those old wallpaper books!:
Ask for old swatch books free from the paint store, and use the vinyl samples as a support for various media. Oil pastels are great because you can layer and sgraffito the pastel and enjoy a bit of the background pattern showing through. See below.
tips, techniques
Oil pastel over vinyl, then scratched through.


art+blog, mixed-media
They DO look like china flowers!
Make your own “porcelain” flowers:
Believe it or not, these “porcelain” blooms are fabric flowers dipped in tinted plaster of Paris!
 
tips, mixed-media


 A cool technique with acrylics:
See my own above! I plan to use this cut up into pieces!
Create interesting backgrounds with rubber cement, to keep certain areas white. First, apply some rubber cement and let it dry, paint a color and let dry, apply rubber cement in an interesting pattern and let dry.  Do again with another color. When that’s dry, pick up or rub off the cement across the entire piece, and see what is underneath.
(I did the one shown above 4 or 5 times on a single white surface, and needed elbow grease to remove all the rubber cement!)
 
Lefties:
For left-handed artists...turn your spiral bound sketchbook upside down and work from the back of the book. The spirals will be on the right side and not interfere with your hand.
 
A fun exercise to motivate you:
When you need inspiration, try the two-hand method. Pick up a different-colored marker or colored pencil in each hand and draw something—or nothing! Move both hands at the same time, alongside each other in a similar pattern. You'll be amazed at what your non-dominant hand can produce. A great warm-up tool.

mixed-media, tips, techniques


Wednesday, November 11, 2015

A TWOSOME OF BACKGROUND IDEAS

For your collage or mixed-media works, here's
an easy, quick dynamic duo.
 These ideas work well not only to serve as backgrounds but also as decorative papers to be torn or cut and added as needed.
First up is a method so simple it's almost embarrassing! Paper doilies or crocheted or lacy fabrics make great stencils for spray paint. And you can use the painted materials later!
collage, how-to
Remove some, add some, and spray again!
Wallpaper makes a wonderful start or mixed media material. Attach a sheet of it to a substrate if you wish to fill in a background fast. The floral below was embellished with painted flowers and stems. It's not a finished artwork in my view, but  I'm saving it for possible future use. I can picture torn pieces coming in handy, maybe.
Guhin, mixed-media
Ask your paint dealer for a discontinued wallpaper book or two!

Saturday, August 29, 2015

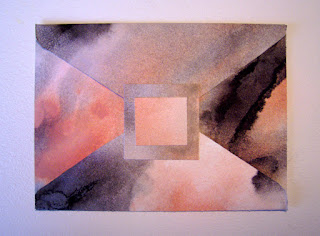
USE YOUR ORIGINAL DECORATIVE PAPER TO MAKE ENVELOPES

MAKE YOUR OWN CLASSY ENVELOPES!
I love experimenting with techniques, and of course I keep all the examples that I like. Those painted papers are great for original, unique envelopes.

how-to
Supplies include a bone folder and glue.


You'll find a pattern in the book, Creating Decorative Paper. A cutting mat is handy in addition to the tools and materials pictured above.

A good set of dimensions might be 4" x 5.5" finished. So you'll need a decorative sheet of paper about 10" x 13". The pattern includes four flaps surrounding the smaller rectangle. You could use an old envelope as your pattern.

Score the paper using the bone folder. Run it along the ruler edge where the flaps will fold. If your paper is too dark to write on later, glue in a white or light-colored insert where the message will go.

how-to, arts-and-crafts
Scoring to create clean folds.
 If the other side of the envelope (where you address it) is dark, paint the return address area and the address area with white gesso or light-colored paint.
When you're ready to mail the envelope, glue on a small
rectangle of painted paper to seal, or use a store-bought
sticker.
Guhin, art, project
White areas for addresses.
tutorial, tute, art-activity
A back side, ready to go!


Friday, May 29, 2015

FOLLOWERS OF THIS ART BLOG CAN WIN! CONTEST!

CONTEST NOW CLOSED.
The prize is an art book packed with
techniques & methods for you to try!
free, giveaway, prize  
Packed with full-color photos!
(Winner was Julie Mortillaro.)


Sunday, May 17, 2015

CREATE GORGEOUS PAPERS WITH THIS TECHNIQUE

I had some black tagboard and the urge to experiment!
Any black or dark surface will work with this method: how to make lovely metallic paper for collage or backgrounds or whatever you wish. (TIP: Tape the paper down!)
You'll also need interference paints (acrylics) and a crackle medium.
P.Guhin, how-to
I tried another crackle brand too, and it worked as well!


First, mix just one of your interference paints in a small container with water to thin it, and set aside. I did not do that with the gold paint, and it was too thick to work, as you will see later.
Next, apply crackle medium thickly to the black substrate, and work fast so it doesn't dry before the next step.
technique. art+blog, Guhin    
This is just the wet crackle medium on black.
Then quickly drip the thin interference paint into the wet surface. It will spread and maybe even separate a bit. 
how-to, tutorial, method, technique
The gold paint didn't work because it was too thick!

Thanks for following my blog!
 

Saturday, May 9, 2015

MIXED MEDIA TECHNIQUES FOR COLLAGE, BACKGROUND, & MORE

I know the two photos below might look unappetizing to some people, but the methods behind them can be very useful!

But first, let me ask you readers about a couple of techniques I tried and failed at:

Have any of you ever had any luck with stamping laundry bleach onto dark papers? My stamps dripped, which could be remedied, perhaps, with gel bleach. And regular bleach is so thin and runny that my "prints" were pretty bad. Maybe if I had some sponge stamps! Yeah, that's the ticket!

Then I tried another idea, hot glue stamped with impressions. But the darn glob hardened too quickly, and my gadgets got stuck in the glue! I've had good results with drips that I then painted with metallic. But stamping a big glob was another fail for me.

NOW FOR THE TWO TECHNIQUES I LIKED...
Dry walnut ink crystals are soooo cool. I know you can get liquid walnut inks in sprays, too, but the crystals are so versatile. Sprinkle them randomly on damp paper, or sprinkle on dry paper and spatter them with water or thin paints. Then you can blot them or not, or tilt the paper for drips (or not).
P.Guhin, art+blog
I actually sprayed the crystals with Color Mists! Subtle but nice.
Chalk powders such as Pearl Ex can also be misted or squirted with water or thin color.
For this example I held the paper up for a few runs in the effect.

Guhin, mixed-media
      You might even use scrapings from chalk pastels.
I wouldn't overdo with the walnut ink idea, but in small doses it might be nice! And the pretty powders make a gorgeous background! I hope you'll try them, and do comment if you've had good luck with bleach-stamping or impressing hot glue. I'd love to see some great examples!


Sunday, April 19, 2015

HOW TO ALTER MAGAZINE PAPERS WITH CITRASOLV

Why buy collage papers when you can make your own, really cool
papers for mixed-media creations? CitraSolv is a natural
cleaning product that dissolves the inks in some magazine papers.

Guhin, art+blog, lesson
I tried to avoid obscuring the figure completely.
Needed Supplies:
CitraSolv (the concentrate)
National Geographic magazines as old as the 60s! I also had luck with Bazaar.
Smock (optional)
Latex gloves
Foam brushes
Q-Tips or a rag (optional)
Container for product (glass or plastic)
Stencils (optional)
Clothespins and a line


Here’s How:
Work outside if possible, as the product has a very strong scent.

Prep a surface to work on. You will want an area to dry your papers,
so you might set up a string clothesline on which to clip your pages.
NOTE: Use care that the product should not get into your eyes or mouth!

1. Prepare a work area. Set up your drying area as well. Put on your gloves. Pour some CitraSolv into a glass or plastic tub (margarine containers are good) and use a foam brush to spread CitraSolv liberally on the colorful pages in the magazine, working from the back to the front of the publication. Smear each page around a little to soften the dyes!

2. When you are done, let the magazine “cook” for about 5 minutes. Check it by opening a page in the middle to see if it looks good yet When you like the results, cut or tear the pages out and hang them up to dry. Both sides will be altered and it may be hard to choose which is better!

NOTE: Be sure that the image you altered is unrecognizable. If it cooked long enough, it will be nothing like the original. This will avoid any copyright issues…don’t use it in your art if you can still tell what it is and where it was from.


My favorite technique for removing ink is to use a stencil as a mask over the page, wiping the exposed parts with a CitraSolv-doused rag. 

tute, Guhin, how-to, art+lesson
Using a stencil is easy with CitraSolv!


how-to, Guhin, art+lesson
This one took a stencil well.


how-to, tute, Guhin, art+blog
Here I masked with rubber cement!
I also suggest trying a mask of either rubber cement or acrylic medium. When either has dried
(though rubber cement remains sticky), THEN use the CitraSolv with a rag! You can rub off the sticky rubber cement later!
When you have finished papers you like, I recommend spraying your page with a workable matte fixative to stabilize the ink and reduce smudging.


Saturday, March 7, 2015

MIXED MEDIA COLLAGE WITH CITRASOLV PAPERS

CELEBRATE SPRING & CREATIVITY
My substrate is a sheet of heavy watercolor paper with wet-on-wet
and sprayed background. Let dry, of course.
mixed-media, Guhin
Blue and orange are complements.
Previously-prepared papers (below) using old National Geographic pages and CitraSolv. See their site for how-to. 
Guhin, mixed-media
I always keep a stash of these lovely papers!


 I cut out and hand-colored a black and white photocopy for the large image.
 
To represent the imagination, I used bird and butterfly shapes that I cut from CitraSolv papers. Inside the head is also made of such a paper.
how-to, tute, mixed-media
The finished collage.
mixed-media


Thursday, July 10, 2014

BLOG CANDY! FREEBIE! GIVEAWAY!

This contest is my way of thanking those
dear hearts who follow this blog.
 
It's easy to qualify for chance to win a copy of my book, Creating Decorative Paper. It's all about transforming ordinary papers into colorful, creative, and unique art materials!
free+book, free, win, contest
Hundreds of instructions for great art projects!


SIMPLE CONTEST RULES:
    • Be a follower of Mixed Media Manic (and I'll love you forever)
    • Leave a comment (just one will do it!) below this post. If you win, I must have a way of contacting you!
    • A name will be selected in a fair and random drawing, and the winner will be notified in my next post right here at Mixed Media Manic.     
Thanks for your loyalty, and best wishes.
Paula
                       

Saturday, June 14, 2014

MAKE YOUR OWN ART PAPER...EASY!

 Papermaking can be fast, easy, and (best of all) cheap! You can do it in your own kitchen or studio with very little equipment, most of which you already own.
mixed-media
Dried flowers have been incorporated into the paper sheet!


There are many good papermaking books you could read, & they usually mention immersing a mold and deckle in slurry (watery pulp).

how-to, tutorial
Large, clean sponges and embroidery hoop.
Instead, I use a round embroidery hoop
stretched with organdy!
The hoops come in various sizes 
& in ovals, too. Or you can
make your own screen with, um,
actual window screening. Either stretch the
screen in an embroidery hoop or dispense
with the latter and simply secure the screen
edges with duct tape.

To make the pulp, I've used molded cardboard egg cartons, junk mail, recycled office paper, clean paper towels, used gift wrap, and an old phone book. Other papers that work well include grocery bags, construction paper scraps, paper napkins, newsprint, and tissue paper.

Materials:
· Recycled papers
· Large pan (like a dishpan)
· A blender
· Embroidery hoop stretched w/organdy or organza, or window screening w/ taped  edges
· Sponges, cloth rags, and towels
· Colander or strainer
· Metal spatula


handmade+paper
Two thin layers with plants & holes.
Optional materials:  
· Glass or Plexiglas panes
· Colorants
· Turkey baster
· Cookie cutters
· Plant materials
· Cooking powders, herbs and seasonings
· Ribbons, string, doilies, glitter, cheesecloth, confetti, etc.

Directions:
Tear papers into small pieces and soak them in water overnight to soften. Make a large batch of about four cups. For a whiter, softer paper, use toilet tissue, facial tissue, or paper towels, none of which require overnight soaking. (Of course, with such acidic papers you won't create a high quality, archival product.)

Note: I have created plant-based pulp in the past, and mixed in a little paper pulp with it for better bonding. I cooked plant materials with firewood ash and rinsed well before blending the pulp. Study up elsewhere on methodology and precautions to take if you plan to make pulp from plant matter.
how-to, tutorial
As sheets dry, you can form wavy edges if desired.
Don't burn out the blender!
Fill the blender about ¾ full of plain water and add ½ cup of pre-soaked, softened paper bits. Begin with short bursts of the blender on a coarse setting. Be careful that you don't overwork the motor. Gradually progress to higher speeds. Blend until the pulp has a soupy consistency. Sometimes you might even wish to deliberately stop blending while you can still see bits of papers, so they will show in the finished product.

Pull a sheet:    
While there are several other methods of pulling a sheet, here's the simple one I use: Fill a large, deep pan halfway with water and then partially submerge the hoop-screen in it. Next, pour thin pulp directly from the blender into the hoop. Wiggle the hoop a bit to swirl the pulp and distribute it evenly, and then lift the hoop from the water.

tutorial, mixed-media
It's fun to incorporate gauze, decorative fishnet, or cheesecloth into paper pulp. With the pink paper shown here, I just picked up wet pulp with my fingers and packed it onto orange fishnet here and there, pressing it firmly into—even under—the netting haphazardly.


tutorial, how-to, art+paper
Halloween gauze + paper pulp in a hoop.


"Couching"
(lifting sheets of handmade
paper onto the surface on which they will be dried) is traditionally done with felts, but a pad of newspaper, a blanket, or a towel works, too. While I do rest the hoop on a dry towel while sponging excess water from the pulp, I do not make a pressed stack in the usual manner.
1. Place the pulpy hoop on a towel. Press the pulp flat with a damp synthetic sponge. One sponging is not enough. Wring out the sponge well and repeat, perhaps with a different, dry towel now underneath. Absorb as much water as possible as you press around the inside of the hoop. This forces the pulp to flatten and bond somewhat to the screen.
2. Instead of using pressing boards to keep my sheets flat, I apply a very easy technique: Invert the hoop (with the flattened pulp still stuck to it) over onto a pane of glass or even directly onto a non-porous countertop!
3. To release the sheet from its "mold" and to form a tight bond with the hard glass or Formica surface, rub all over the back of the organdy "screen" (the underside is now facing up) with a dry sponge or cloth. Pay special attention to the edges to liberate the sheet from the hoop.
4. Then remove the hoop and press the damp sheet very firmly to the glass or the countertop. Thin sheets stick very well and dry flat. In fact, later you may need a metal spatula to free them (carefully) when they are thoroughly dry. If warping does occur, it will appear at the edges first. Place a heavy weight on top to flatten, or cover the sheet with a pressing cloth and iron it flat at a medium heat setting.


handmade, papermaking, weaving
Besides handmade paper, this weaving includes fibers,
fabric, bamboo skewers, art paper, and gold leaf.


Adding color:
Coloring agents can be added either to pulp in the blender or to pulled sheets. Fabric dye is best (in my opinion) but ink, tempera paint, watercolor, food coloring, even liquid acrylic paint can be used for pigment. In addition, some tissues and construction papers bleed their color into the pulp. (Several of the coloring agents mentioned here are not colorfast or lightfast.)
You can combine small batches of different-colored pulps into a single artwork, too. Cookie-cutter shapes are easy to make, and they can be pieced together, mosaic-style, while the pulp is wet.  Or do a web search on "pulp painting" and you'll learn how to create a free-form paper piece with a teaspoon, eyedropper, or turkey baster. Here's a link to another way (NOT free-form), using stencils: http://www.denisefleming.com/pages/papermaking.html

Other additives:
For color, scent, or added interest, the following materials can be thrown into the blender with the pulp, or pressed into a "finished" sheet that needs something extra: curry, turmeric, or chili powder; dried dill, basil, oregano, parsley, rosemary, or thyme; ground cinnamon or paprika; and saffron. Try tea leaves, instant tea or coffee, or coffee grounds, too.
You can also add confetti, glitter, or small pieces of snipped threads. Throw in a little dryer lint if you wish! TIP: Use lint from a load of denims for blue specks.

Texture techniques:
Emboss (or deboss, depending upon which side of the handmade paper you use) by forcefully couching a wet sheet directly onto a thick stencil, plastic template, cord, hefty crocheted doily, or textured rubber matting. Leave the textured articles in place, with a weight on top, until the paper has dried.
Another idea is to embed dried leaves, flower petals, ribbons, and more between thin layers of wet pulp. Or deliberately wrinkle the couched, wet sheet and allow it to dry that way. Fold, pleat, mold, and sculpt the paper!
TIP: When you are finished, strain the slurry and store leftover pulp covered in the fridge. Never, ever, EVER  pour it down the drain!
Use your dry handmade paper for journal pages, book covers, collage materials, and many other creations. It's wonderfully absorbent, so dye it, paint it, and draw on it. Cut it, pierce it, sew or weave with it.

P.Guhin