Showing posts with label tutorial. Show all posts

Thursday, April 2, 2020

MIXED MEDIA COLLAGE - PAINTING ON CANVAS

I WOULD LOVE A NIFTY TITLE FOR THIS NON-OBJECTIVE WORK.

GOT A TITLE SUGGESTION 

FOR THIS NEW, MIXED-MEDIA WORK?

STEP-BY-STEP FROM SKETCH TO FINISHED PROJECT

MY ORIGINAL SKETCH...I thought it would be horizontal!

I wanted a limited color scheme of cream, light and dark gray, and cool red in a variety of values. I used acrylic paint, textured papers, my own decorated papers and more.

The photo shown below is in progress.  I goofed by leaving a very dark area in the center.

At this point I hadn't yet decided to finish the piece as if it would hang vertically.
The finished work.

Note (above) the several small, brighter accents as focal points. 

Please comment if you have a good idea for a name for this. 

Or if you like it!   THANKS!

Tuesday, March 24, 2020

HOW TO PAINT A TIE-DYE EFFECT ON CANVAS SHOES

PAINTING FOOTWEAR WITH A SPLASHY TECHNIQUE
 
Look closely to find where I forgot to remove some tape before taking the photo.
MATERIALS:
Shoes
Tape (masking)
Water
Brushes
Fluid acrylics
A palette
A flow aid (optional)

I used inexpensive canvas tennies (trainers? sneakers?) in white, 
but any light color will work.
First, tuck the laces inside the shoes.

Tape off the outsole if you don't want to get paint on it.
 

For a soft, tie-dyed effect, wet the canvas first with clear water 
(I used a clean paint brush).
 I applied the acrylics (mixed with a flow aid) with the tips of
brushes, working quickly before the canvas dried.


 When I was done, I upended the shoes onto heavy tumblers
and let them dry thoroughly.
I hope this has inspired you to try your own fancy footwork!

Saturday, January 4, 2020

NOT A PAINTING: EX VOTO ASSEMBLAGE

YOU CAN BUILD AN ASSEMBLAGE WITH HEART
I'm happy to take you through my process, especially since this shrine or construction is very dear to me. I knew and loved a young man who was on the wrong path, wild and a bit rowdy sometimes. He nearly died in a car crash, and was left with head injuries. (He's much better now, many years later, thankfully.)
Here you can see a toy car and small head in the upper part of the photo.
I based this new  assemblage roughly on a
votive offering placed in a church or shrine
as thankfulness for a miracle received.
Mexican retalblos are small oil paintings, generally made
on tin. An ex voto is a votive offering to
a divinity, usually Christian. Read more  about them here:
(click on this link)  https://en.wikipedia.org/wiki/Ex-voto

  Materials I used:
Strong, clear adhesive 
Wooden shelf, picture frame, and small box
Found objects (many are pictured below)
Discarded beads
Acrylic paints: Diox. purple, Quin. red and Quin. gold,
    Mars black, Titanium white, and Ultramarine blue. 
Copper patina
I decided against some of these objects and altered others.
  Traditionally written (usually at the bottom) are inscriptions, names, dates, and stories of miraculous recoveries and escapes. I chose not to do that.
For more history on ex votos and info on modern, current ones, click here:
http://www.mariolinasalvatori.com/understanding-ex-votos/
This might have been where my friend had gone if he had died years ago.


Here's a close-up, below, of the broken, burnt glass that sits below the devil.
I also put rusty barbed wire just below 
that (not too visible, sorry), and again 
where "Hell" ends, just below the car and boy.
Here you can see the beads and the costume jewelry pin.

My recent assemblages might seem a little sinister
to some of you...I mean, Medusa? Now this!
But I have always loved icons and myths.
Have I gone to the dark side? 
What's your opinion? I'd love to know.
Below is a link to a much sillier assemblage
that I created quite a long while ago.

BELOW, A FULL VIEW OF THE FINISHED PIECE!

Do you think this is appropriated art? 
I'd love to hear your comments! This was a love project for me, and
I feel I've put my own, original stamp on the artwork. And I didn't include any inscription or a saint although I do have religious elements in the top half of the piece.  (There is also an image you can't see of a saintly figure, in the dark, under the hand.) 
Do you find it too depressing or ominous, with the devil and horns?  

I do need a title for this piece, so if you have a good idea, 
please let me know!
Thanks for viewing this post. I appreciate you.   ---  Paula


Saturday, November 9, 2019

NEW COLLAGE - PAINTING step-by-step

Learn how I created a mixed-media artwork in sequence!

I began with a used canvas, barely gessoed with thin, watery white gesso so the unwanted painting below would show through somewhat.

Rough blocking out of the lowest and highest values is always a good idea, at least for me. You can always change your mind later, but this gave me an idea of my layout.
Step 1
Next, I mixed a blue-gray acrylic paint and applied mid-tones. 
Pointer: Always strive for balance, even at an early stage.
Step 2, some mid-tones added.
 Then, collaged papers and text, and a small, real feather.        
I also stamped pattern to create a few bright accents.        
Petroleum jelly can be applied selectively (I used streaks) 
to protect previously-painted areas. Make sure that the   
paint is dry before you apply the resist (the petroleum   
jelly). Then paint over that with a contrasting color.   
Let THAT paint dry, then wipe off. A really cool effect!
    
THIS FINISHED WORK, BELOW, IS DONE IN A TRIADIC, PRIMARY COLOR SCHEME.

"Temporary," by yours truly, Paula G.


Thanks for viewing this post! I appreciate it.


Saturday, October 12, 2019

A MONOCHROMATIC EXERCISE FOR ART TEACHERS & OTHERS

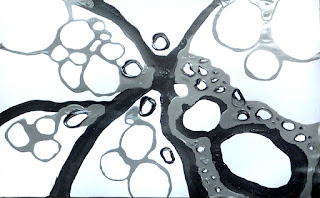
SQUEEZE-BOTTLE LINES WITH BLACK GESSO
 
Gesso has enough body and tooth to use as a barrier to hold in wet media, once it's dry. 
gesso, painting
I made my own black and gray gessos.
You can buy colored gesso or add acrylic color to white gesso. A clean squeeze bottle served me well for "drawing" the shapes. I also filled in some areas. Then I let the design dry overnight, before painting. See the first step above.
 
Then, the next day, I used diluted paint to complete the forms and shade parts of the background. 
painting, Guhin
This study was finished with fluid black acrylic and water.

The water and paint stayed within the confines of the slightly raised gesso lines. This exercise might be good for middle schoolers or beginners at the high school level. Art teachers could substitute watercolors at the painting stage if desired. Even pastels would be great! Students could create their own designs rather than relying on this "Pebble" motif, of course.
Guhin

Tuesday, January 24, 2017

BOOK ART: Anyone Can Do It!

I'm not one to fold book pages into fabulous, complicated designs, but I admire those who do.

Guhin, mixed-media This is a terrific way to create beauty from unloved, unwanted books.

I'm the free-form type, decidedly not methodical, so the project detailed below was just my style.

I filled a large pan with a little acrylic medium and a lot of water.  White glue would be a good substitute for the medium. I also collected thin pencils, thicker ones, and fat rolls of waxed paper. These would serve as armatures. Remove hard covers from the book unless you want a straight "stem."
mixed-media, art+blog
Oh, but wait, there's more!
Dipping pages--still attached--into the pan (sometimes just one or two, sometimes more!), I wetted them, removed from pan, and rolled. I varied the directions and amount of curve, as you can see in the photo above. And yes, this takes awhile, since I only recommend doing a few sections at a time. I left the supports inside until dry, but the diluted mixture dries fast. 
art+blog, mixed-media
Took a couple of days, but so fun and simple to do!

I used spray paint and a touch of brushed-on acrylic paint on  mine. Then I photographed it from above. I suggest either white, gray, or black as a background.

Here's another idea to try, if you're more precise and meticulous than I: a butterfly!

                (Art teachers might find discarded books and try this with fast-working kids who always seem to need more to do. If not photographed with a digital camera, try scanning.)

Saturday, September 3, 2016

NOT ONE BUT, COUNT 'EM, TWO TECHNIQUES!

METHOD ONE: CREATE INTEREST WITH INDIA INK...
A SHARP IDEA!
Besides the permanent ink in a shallow dish, you'll need a single-edged razor blade.
how-to, tutorial
This is the ink I used, and it worked fine.
My first example, below,
was done on watercolor
paper, but do try Yupo or
even a canvas!
Dip the sharp edge of the
blade into the ink, and use
it as a drawing tool
on wet or dry paper.


art, blog
I've done both here.

 METHOD TWO: GESSO HAS PULL!
In this demo, you'll pull a wide brush of white gesso through wet color and ink lines. But you must be quick and work while it's still wet! I used a primed canvas as my substrate. Do limit your paint palette to three or four colors that work together. You'll also need a spray bottle of water, a rag, and the goodies we used above in method one.
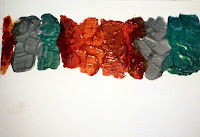
FIRST: Paint swatches of your colors all across the surface, leaving some bare white above and below.   

art, blot, acrylics
Colors included several metallics and Quin Nickel Azo Gold.


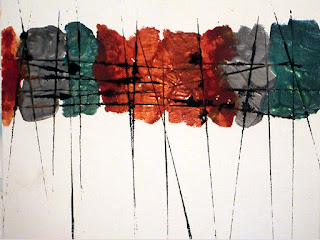
SECOND: I used the trick from method one, both horizontally and vertically, before the paint could dry.

Guhin
Is your wide brush filled with gesso for the next step?
Note that I extended my black lines to the bottom but not at the top of my painting.
THIRD: Pull the brush and gesso down through some of the paint and ink at the left of the page, and continue across in the same manner. Beware of muddiness...you might wish to clean the gesso brush once or twice. Don't do anything at the top of the artwork just yet!
painting, art+blog, mixed-media
Still not finished, but cool beans, huh?
FOURTH: Spray clear water on the top portion and tilt the paper, encouraging it to run a bit. If the paint and ink is now too dry to flow, add a little more as needed. I also tipped my canvas for some flow toward the bottom!
Blot anywhere it's needed, or blend with a clean brush, or add more lines, or dots of color, spattering, even a few scribbles! (I had a great time with mine, below.)

technique, tutorial
I even used gesso to make more razor blade lines.

Thanks for viewing this post! Do come by again.


Tuesday, March 29, 2016

IMAGERY, WORDS, STENCILS, LAYERS, & COLOR!

This collage - painting began with a simple 
background and few elements.
art+blog, mixed-media
Let this dry before moving on to the next step!
Here's a photo of the collaged background, above (with gel medium below and on top of the pieces), before any of the next steps took place.
Some areas needed to be toned down a bit, so I applied a thin wash of white gesso in places.
acrylics, collage, mixed-media
When the gesso was dry, I used acrylic ink too!
I sprayed the acrylic ink through stencils to add interest. Rather liked the piece at that stage, but really wanted to go on with a death's-head figure and some stamping, soooo....
technique, how-to, tutorial
A Sketch 'n' Wash pencil for the figure.
TIP: Always protect your finished work. I had to apply a spray fixative to this one.
Guhin, art+blog


Thursday, November 5, 2015

TREASURED TEXTURE TECHNIQUES

FIVE FABULOUS WAYS TO ADD DIMENSION &
INTEREST TO YOUR MIXED MEDIA WORK
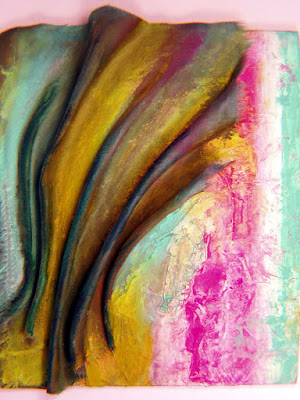
The first example depicts fabric folds collaged onto a sturdy support. When the adhesive (acrylic medium) was dry, painting over the rhythmic folds was easy.
collage, mixed-media
Tactile! The ridges really stand out.
 
mixed-media, art+blog
I painted & stamped the bubble wrap first, then squiggled.


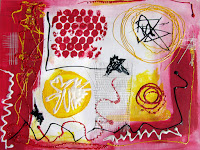
Secondly, texture achieved with dimensional paint writers, above. Let yourself go and have fun with these.
 
 Next up, a textural method using a stucco-like medium. I pressed mesh into it while it was still moist and let it dry that way. Then I peeled off the mesh and painted, washing a dark, thinned color into the crevices.
texture, copyrighted
Like many of the paste mediums, stucco is very absorbent.


 Modeling paste was mixed with acrylics in the example below. Not pretty, I know, but it could be painted to look more appealing when dry.
Guhin, how-to, texture
I used a stiff square of matboard to scrape.


For our final textural method, below,
I used a chiffon scarf (found at a thrift shop). A heat gun shrivels, puckers, and generally makes the fabric very cool! (Hot but cool.)
tute, mixed-media
This photo is before painting!
I hope these ideas spark more creativity in YOU! Tip: Try the one that gets you the most excited...your finished piece will surely be a stunner. 


Saturday, July 4, 2015

LOOSEN UP! ABSTRACTION TECHNIQUES

Do you want to work less realistically and more abstractly? Letting go takes practice. Open up with these ideas.

Base an artwork on a piece of one of your own sketches. Here's one of mine, below, which I cut into sections.
how-to, tutorialdrawing, Guhin
On pastels paper, using water-soluble oil pastels, I made the quick abstraction below based on just one of the pieces.
tute, techniqe
Here's another way to find abstract compositions: Cut out just a small portion of a magazine photo, as I did below. 

pastels, how-toThen I played with soft pastels
(Rembrandt is an excellent brand).
Be loose...you're not trying to be exact!
Guhin
I'm not crazy about the red in the center!


art+blog, mixed-media

Saturday, June 27, 2015

FOLDS IN THE FLAG…FOR INDEPENDENCE DAY!

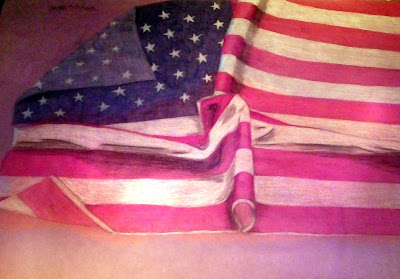
In honor of July fourth, coming up soon, here's a study
in colored pencil using a flag or drapery.
This drawing project is quite challenging. Berol Prismacolor pencils are best.
tutorial, drawing, colored+pencil
The student flipped 2 corners of the printed fabric.
The following colors are suggested:
  • Black
  • White
  • Gray
  • Tuscan red
  • Crimson red
  • Scarlet lake red
  • Blue-violet
  • Ultramarine
  • Indigo blue          
I like to pin the fabric folds into place on a large sheet of cardboard, since the entire activity takes a good amount of time to complete.
 
I always ask my students to use a large sheet of brown wrapping paper so they can work big! But you could work on white or toned paper if you wish.

Sketch very lightly in pencil first, blocking in the shapes and the folds.

TIP - Begin with the blue field first if you wish. One reason to save the white stripes for last is that you can protect the other colors with sheets of paper. Otherwise your reds and blues will bleed or smear into the white.
Guhin, how-to, tute
Remember to add shading under the flag where needed, too!
TIP - Shadowed areas around folds require a touch of blue, not just black or gray!

Blending is key: An art gum eraser and a waxy blending pencil (made by Berol) will help lots. If your students are less experienced &/or younger, practice with solid fabric instead of stripes, as shown below. 
drawing, colored+pencil, how-to
White fabric with blue and violet shadows.


Friday, June 12, 2015

STENCILS AND LAYERS OF TEXTURE

USING BOTH NEGATIVE AND POSITIVE STENCILS

THAT YOU CUT YOURSELF

As you probably know already, the negative space in a composition is any part that's NOT the subject...it's the space surrounding the subject.
 
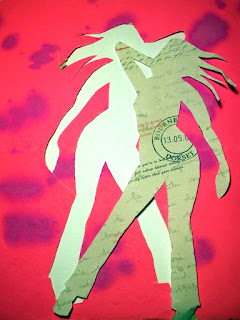
When you cut a stencil of your own design, if you want to use both the "background" and the "hole" shape, you may have to do some patching--I know I did! I cut two stencils together in a "sandwich" so I'd have a spare. But I don't recommend that! My stencils aren't perfect by any means! Below is the positive, cut from scrapbooking paper, and the spotty magenta one with the hole cut out.
how-to, technique
I didn't discard anything, in case I needed it.
For the finished collage below, I used spray paint and acrylics, and three different patterned stencils besides the figure stencil. Some pattern was added to my substrate before the figures were included, and some pattern came afterward.
Guhin, art+blog
Both a positive and negative in one artwork.
You might wish to try two different canvases with this idea, creating a diptych, displaying them side by side!