Showing posts with label paint. Show all posts

Tuesday, May 5, 2020

MUTANT, A COLLAGE PAINTING IN MEMORY OF PLAGUE VICTIMS

I'm mad as hell about it, hate that 100,000 Americans could die from Covid-19, and countless others have already lost their lives in the pandemic.  I'm in sorrow, sheltering in place & hoping you are staying safe.
This artwork began on a vintage anatomy chart. 
It was a canvas-like scroll with rods at top and bottom.
I'll show some steps and techniques below. 
chart, guhin
Original old medical chart.

detail,guhin
Because the virus is rough, I added texture in places.

I didn't want the original warm tones of the figure (they were too pleasant), 
so I made a Dioxazine purple glaze. But I didn't like that either! So I went blue.
A cool blue wash (acrylics & water) for some of the
background, too, and white too. But I also wanted visual texture.

tip, guhin
PAINTING TIP: Open a packet of de-oxidizer, desiccant or silica gel (sometimes found
in new shoeboxes). I sprinkled those tiny pebbles into the wet paint
and got a cool effect!

close-up, guhin
Close-up of part of the painting and collage elements.
I painted a cut-off tree trunk to symbolize all the lives cut short.
I collaged a cut-out eye, heart, and 3 birds into the piece. 
Owls and ravens are symbolic, too, of course.  
art, guhin
21" x 5.5'

partial,guhin
detail, guhin
Detail of ravens.

Tuesday, October 11, 2016

NEW WAYS TO LIQUEFY YOUR TUBE ACRYLICS

AND DO IT WITH COMMON HOUSEHOLD PRODUCTS!
 Today’s post is an addition to or further exploration of my last post, where I used Future floor polish (now called Pledge Floor Care with Future shine), basically a clear acrylic emulsion about as viscous as vegetable oil. I learned that it was a great extender or flow improver. Future floor polish is also both a great clear coat on finishes (especially on Yupo!), and a barrier between two different kinds of finishes.

Thin, flowy acrylics can be used to drip, spatter, pour, as an ink in pens, airbrushes, and squeeze bottles. They also make great glazes, especially when added to clear acrylic medium. But thinning acrylics can be tricky! Your paint MUST be like skim milk WITHOUT any lumps! I thinned and creamed the tube or craft paint with a little water first.
Many of you may already know that isopropyl alcohol can be splattered into wet, fluid acrylics to create a cool effect.
Well, it can also be used as an acrylic paint thinner! But this time I will discuss another unconventional, unexpected thinning medium. 

Guhin, blog
This stuff works great to liquefy acrylic paint!

Thinning Acrylics with Glass Cleaner
In its usual form, glass cleaner is a blue tinted liquid. Unlike the floor polish, glass cleaner has no acrylic binder so it cannot extend the paint, merely thin it. Glass cleaner has a tiny amount of detergent and some alcohol to reduce surface tension of the water. Most glass cleaners also have ammonia which helps to keep acrylic emulsions liquified.

TIP: Next time you finish a painting session with leftover paint, make some of it liquid and pour into a clean spray or squeeze bottle. Be sure to label the bottle as "fluid." 
Hey, thanks for viewing this post...I hope you try this stuff, as well as
the floor polish and the alcohol!
And have fun, fun, fun till your daddy takes the T-Bird away!


Monday, March 21, 2016

GOUACHE RESIST? AN IFFY OUTCOME BUT QUICK FUN!

I've always used this technique with tempera paint, happily. See white-tempera-resist for a similar example. Never tried it with gouache, which is somewhat comparable to tempera, and never tried it with a portrait as subject matter. My results were mixed, but the mixed media method was fast and a pleasurable process. It's always exciting to see what you get!
MATERIALS:
  • Pencil
  • Watercolor paper
  • Brushes
  • Gouache (or tempera!)   
  • India ink
  • A sink                                
    how-to, tutorial, resist
    My very light pencil sketch,
    made darker here for contrast.
I used a hard pencil on an excellent hot press paper, about 8 x 11" and heavy weight. I didn't need to tape it down, but if your (absorbent) paper is lighter, do tape it to a board.


The next step is to block in a flesh tone.

technique, Guhin
My girl ends up a bit goth later.
IMPORTANT: Wherever you want to save white, apply white paint! Be generous with your highlights. The whites and highlights of the eyes, tops of cheekbones, a bit on the nose, chin, forehead, even in the hair.
resist, technique, tutorial
NOT finished yet, and creepy too!

I also used blue-violet for shadows. My gouache was a cheap brand, and I likely didn't apply it thickly enough, but you should! Thicker the better!
TIP: Remember that you cannot layer any paint colors, since the first tone you paint on the paper is the one that will show later.
LET THE PAINT DRY.

Finally, gently apply waterproof India Ink over all, without scrubbing. Not showing that step, because, you know, who wants to see that? Protect your work area, your hands, your clothes, and use a wide, soft brush. LET DRY!

This final part's a blast! Rinse off the black ink under lukewarm water. Here's the big reveal, and I hope yours turns out happier than my sad girl! But do see below for other ways to improve a semi-successful piece.

portrait, MixedMediaManic
My end result: no red, very little blue, darn it.
TIP: Correct mistakes with white or black paint after the final is dry.
AND you can even add other colors after the fact, as I did with my
previous tempera example.

mixed-media


Monday, January 25, 2016

MIXED-MEDIA TIPS, TRICKS, & HINTS

This is my final post in the current series on handy suggestions.
See several more (previous) pages for more ideas!

 
Brushes straight up!:

The best way to store brushes after cleaning them is to get a nice-size block of green florist's foam. Stick the ends in the foam, leaving the bristles to stand on their own.  
art.painting, hint
Water drains from the ferrules this way!
Going straight:

When you want to paint straight lines, try an inexpensive pizza cutter. Thin the paint the same way you would for a liner brush, until it is an ink-like consistency. Roll the pizza cutter through it, then roll it on the canvas. Or try wooden skewers as painting tools. AND/OR the painted edge of a piece of cardboard. Cool!

art+blog, mixed+media

 
Mr. Clean Comes Through:
The "Mr. Clean Original Magic Eraser," which is mostly used for household purposes, removes dry watercolor paint if you first soak it (the magic eraser) in water, squeeze out the excess, and rub gently over the paper.

Painting tip:
Tone your canvas before use. This gives an immediate mid-tone to the painting, and you can start adding light and dark values right away. Or, if using gesso first, tint it first.

Make your own sepia paper:
To make beautiful, sepia-colored paper for art projects, soak sheets of heavy white papers in a casserole tray filled with warm, brewed coffee. Set sheets to dry on racks designed to cool baked goods. The cooling rack will leave an attractive design on the sheet -- to keep it plain, line racks with waxed paper. You may also wish to sprinkle sheets with the coffee grounds (to be dusted off later), leaving dark sprinkles of color.
 
MY PERSONAL THANKS to the followers who stick with me...I seem to take it hard when one quits, even knowing there are multiple possible reasons beyond control. DO let me know if you crave more mixed-media paintings, or assemblages, or whatever makes your little hearts beat faster. I live to serve.


Saturday, February 7, 2015

CAMOUFLAGE AND COLLAGE


Disguise an object, blend it into the background,
for a truly cool effect. Fool the eye!

Painters have used paint brushes
(see the top piece at this link)
and other objects in a manner similar to this idea.
Be creative with camouflage. It’s an exercise in disguise!

camouflage, mixed-media
Make a statement with your art!
YOU WILL NEED:

  • A map, comics, poster, wrapping paper…even print fabric adhered to a sturdy surface. Cover the background. TIP: Choose a pattern that you will want to duplicate yourself.
  • A lightweight toy plane,  car, figure, animal, utensil, any smallish object that’s somewhat flat (low relief). Perhaps similar to or in keeping with the pattern you chose, OR you could go the opposite way (a snake in the beautiful garden, or a rubber knife on a background of images of harmless toys, for example).
  • TIP: Use sandpaper to rough up slippery plastic items.
  • Gesso the small object and, when dry, paint it to match the background. Place the (dry) object where it will eventually be glued, and mimic the parts of the pattern that are underneath, with paint. I.e., your goal is to camouflage the object and fool the viewer’s eye—at least from a distance! Seal with a clear coat when the painting on the object is finished.
  • Then adhere the low relief object, using a very strong adhesive such as heavy gel medium.
P.Guhin, copyrighted
When not viewed at an angle, the doll blends in much better.
Thanks for your interest in this project! - Paula


Saturday, January 31, 2015

AGAIN WITH THE FLAT SHAPES, BUT DIFFERENT!

Just as last week's post used a layer of paint to
define shapes, you will create flat layers of color
with this painting method too!
I won't lie to you...you must be patient to try this with a fairly
complex design, but the results can be very pleasing.
how-to, acrylic, paint
I used a complementary color scheme of orange and blue.
First, choose a limited palette with no more than 5 different values.
Rules are made to be broken, of course, but 4 or 5 tints and shades
are my suggestion. They should probably range from very light to
very dark, but again that's up to you.

I wanted white in my painting, so painted the entire canvas with
white first, and let dry. For my subject matter I considered
dancing figures, which would be terrific for this project,
but went with the branching trees instead.

Select a motif that you wish to repeat, and begin with the lightest color, as I did with the pale peach trees at the right, above. Never mind the peach in the background...that comes last!
Next, I painted in the two orange trees (note how one overlaps a peach tree a bit), then the deep blue ones, and finally the dark brown trees. Let dry between colors, and do some overlapping to add interest and tie everything together.

Finally, carefully, fill in the flat negative spaces. (Youngsters--heck, even semi-oldsters!--may not have the motor skills for this.)
                                         THANKS FOR VIEWING THIS POST!


Saturday, January 17, 2015

MORE ART PRODUCTS & EFFECTS ON A WET SURFACE

In the previous post here, you'll find visual texture effects and more on watercolor paper. Today we'll use the same type of watercolor paper to experiment dry-on-wet with a number of waterbased products. If paper becomes too dry, re-spray with water as needed.

art+blog, Guhin
Water soluble art media
Scrape dry pigment from color sticks with a knife, or rub the color over rough sandpaper. As you'll learn, I only had really good luck with the latter with one of the  the above water-soluble materials. (But that's just me.)

#1 is Cretacolor wax crayons with
knife scrapings onto a wet strip.

#2 is Portfolio water soluble oil
pastels (LOVE THEM!)
art, tute, tutorial
The last two are my favorite effects here.


#3 is Weber Costello WaterCrayons...
do they even make them anymore?


#4, I used Crayola Watercolor
Colored Pencils for a
fine, misty effect
in water.


#5 was done with shavings of
Neocolor II Watersolubles.

And do try dropping dry
crystals and concentrates
on damp paper.
Order it here!
 Brusho is still my all-time
"bombastic" product for
a strong pigment on
a wet surface...it blooms
beautifully! Love it! See Dyes
in Dry Form in my book,
CREATING DECORATIVE
PAPER


art+blog
I "heart" my followers!

Monday, October 27, 2014

ANTLERS: AN UNUSUAL PAINTING SURFACE

SOME ANTLERS ARE TOO BEAUTIFUL TO COVER...
THEY ARE LIKE FINE IVORY.
But if you live in an area frequented by deer, you might find their antlers shed in or near trees. You can also buy antlers on eBay!
 
antler, Guhin, project
A found object.
I'm unlucky enough to live in an area well-trafficked by hunters,
but I do often find antlers. When I wished to use some of them in a
decorative painting project, I tinted gesso with yellow oxide or simply
used the white gesso. Gesso is a primer that helps the paint to stick.
 
project, decorative


project, Guhin
Colored gesso is the first layer here.
 Guhin, project
I used stencils and spray paint on this example.


For an ombre or gradient effect I used spray paint in black, copper metallic, & brown.
I also masked off areas
with a stencil.

Another idea, especially if the antler is textured with ridges and bumps in places, is to drybrush over them with a contrasting color!
Or try gold leaf!

paint, acrylic
I prepared to do the stripes in the example below by adding
masking tape and burnishing it down thoroughly before
painting an area. I wished for some natural antler-color to show
in some places. I also wanted to include some Native
American-like symbols, drawn on with paint marker
 afterward. NOTE: When creating stripes next to
each other, let dry and seal with matte medium
first, before taping. This intermediate layer helps
keep tape from peeling off some of the acrylic paint.
 
Guhin, copyright
Always let dry thoroughly between additions.

Guhin, project
Altered Art
decor, decorative, Guhin
Ancient symbols add interest.


Seal when dry, using clear acrylic medium to help preserve your masterpiece.


Tuesday, August 26, 2014

GUEST ARTIST ROBIN LARIDO, A MIXED MEDIA TALENT!

I met Robin in cyberspace, on LinkedIn in the mixed media/collage group. She's a peach and is nice enough to share these works with us. The links beneath the images take you to her Etsy shop.
Her first piece, shown in two photos below, is dimensional and tactile.
Mixed Media Photo Collage Painting Rustic Elementsmixed+media
https://img1.etsystatic.com/033/0/6042216/il_570xN.648003577_8s9s.jpg

art+blog, Guhin
https://www.etsy.com/listing/201283849/mixed-media-collage-rustic-elements-on
The collage above was done with acrylic paints, Glimmer Mist, PearlEx, tulle mesh, a photograph, textured cardboard, brown paper, text clip art, tree bark, butterfly image, copper jewelry wire, heavy gel medium, & clear waterbased varnish.                  

About Robin

"I'm a mixed-media craft artist. I love to design and create wall hangings, quilts, altered books, collage and assemblages with lots of embellishment. I enjoy making hand-crafted gifts for family and friends, which are always appreciated.

"I take my inspiration from my surroundings, incorporating lots of flowers and natural elements in my work. I live in Croton-on-Hudson, NY.

"I majored in Fine Arts at Brooklyn College and also studied graphic design and art mosaics. Some of my work was published in the Summer 2009 and Summer 2011 issues of Somerset Studio Gallery magazine."
 
Thanks, Robin, for guesting here! And for using some of the spare photos I sent you in your work!
Paula Guhin, the Mixed Media Manic.

Saturday, November 16, 2013

WINNER ANNOUNCED! (WATCH FOR ANOTHER FREEBIE ART MATERIALS CONTEST IN FUTURE.)

The lucky artist whose name was chosen at random to win the 6 art supplies is Sue Morris! 

I want to thank the others who participated, and encourage them to try again here for free paint products later, as I cull my huge collection.

Sue, please email me privately with your postal address so I can mail you the prizes!

Paula Guhin

Saturday, June 8, 2013

PAINT FURNITURE AS A "CANVAS"

I found this old rocking chair on a pile of discards. But you can use an old door, a bench, a stool. or a wooden shutter as a painting surface!

painting on wood
One arm was missing, so I removed the other one.


painting furniture
I filled holes with wood putty and let dry.


I used sandpaper not only to smooth the wood but also to take the shine off the surface. Then I wiped it with a damp cloth.
painting on wood


A smooth coat of gesso came next.
After the gesso was dry, I began to paint with acrylics.
painting furniture artistically

I even decorated a pillow with fabric paint to use as a cushion...
                      

             But I prefer the plain gold-colored pillow with the finished product.
  
how-to
Painted chair.


Saturday, February 16, 2013

BE A DRIP! A MIXED-MEDIA EXPLORATION


Here's a great way to intensify a focal area, adding interest to a painting or collage. Experiment with inks, fluid paint, water, and more! 

technique, how-to, how to
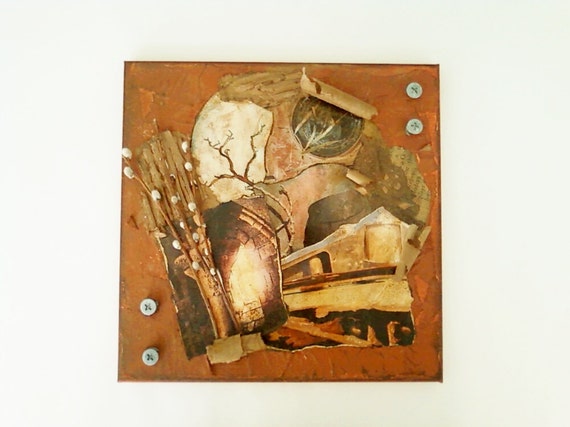
Underpainting for the drip technique.


Paint a base, an underpainting, on canvas or paper first. Your palette might be of several colors, with lights, darks, dulls, and/or brights. Markers make a good addition at this time, too. (Waterbased markers will run and add even more fascination!) Let dry.

painting, drip painting, tutorial, tute
The white drips add a high value to the painting.


Prop the canvas or paper at a sloping angle.


Use inks, liquid watercolors, or thinned acrylic paints. Pour them selectively or apply in places with a brush and let drip. 


tutorial, art lesson, non-objective

Next, mix watery paint in another color, value, or intensity, and do more dripping. Here I added a few spatters too! 

Note: you can tilt the canvas any direction you wish, even changing direction as you go. If you have a spritz bottle of water handy, use it to encourage more dripping and dilution as needed. Another helpful tool is a hair dryer, which can alter the flow or slow it down.


technique, tutorial, mixed media
Rework the painting as desired.
Paint out some sections to make them appear less busy, more calm.

If you don't like the painting you've created, use it as the background for a new work. If the unsatisfactory piece is on paper, you can cut or tear it apart and use the best pieces in a collage! 

Yes, chance plays a part in the dripping technique, but it adds 
emphasis and appeal.

art blog


mixed media, art blog