Showing posts with label photos. Show all posts

Sunday, December 25, 2016

MONTAGE & SCRAP PHOTOS & MORE

Duplicate prints and downright bad shots
 can be put to good use...I've said it before.
SURE, PHOTOSHOP CAN ACCOMPLISH ALL THESE
TECHNIQUES, BUT THE OLD-FASHIONED
WAY IS AWFULLY FUN.
In this first example, a large print served as the support (or background, if you will). Then I found other, smaller prints to cut up and arrange to make the work more interesting. Do try this, but only glue the pieces down when you're happy with the composition. I like the complementary colors together.

collage, montage
Good method for hiding the worst parts!
This next idea is the "more" mentioned in this post's title. My so-called example below is a straight photograph, with no manipulation or mixed-media. But it gave me an idea! Make your own "trellis" with thin chart tape, fine-line tape, or other colored tape! So easy, and yet you can be as creative as you wish.
how-to, tutorial
Copyright Paula Guhin
Our third photograph has been manipulated a great deal!
It's a weaving, of course, with yarns, wallpaper strips, and more.
I worked around the figure...she's not simply pasted on top!

 
I've featured other fun photo projects on this blog. Check out this photocopy fun page and this painted collage post. Also another painted collage page here. AND 3 photomontages, fun and cool.
Happy New Year, everyone!

Friday, November 25, 2016

ALTERING PHOTOS FOR FUN!

photo, how-to, mixed-media-manic
Scratched first, then the color was enhanced with markers.
Got any old processed prints that just aren't the best? Did'ja go through old albums with relatives at Thanksgiving (or maybe you WILL, at Christmas), and found or will find some duplicates or just plain bad shots? Here's some ways to have PHUN WITH PHOTOS! Even with kids (see my caveat below)! One or two can even be done with inkjet prints, while a couple of others require commercially-processed pics.

First, for the scratching activity (the photo above with the leaded glass), dip a processed print in lukewarm water about a minute, blot, and use scratch tools or even sandpaper on the parts you wish to lighten or remove. If the emulsion hardens too quickly, just run warm water over the picture again.
If you want, add color back in with markers, watercolors, or inks. This project is a great way to re-work photos that contain distracting elements! Here's a link to another scratched example.

Next, bleaching the print is best done on a commercially-printed photo, since rinsing afterward is a good idea. Inkjet prints would run with a water rinse.) Try a bleach pen if you want to write words or numbers or symbols. Then wipe with a damp paper towel, rinse under water, and dry. Young children should not attempt this project.
tute, how-to, mixedmediamanic
Shot inside an old house to "frame."
In the photo above, there was just too much dark and my view wasn't great anyway.
BUT, here's another way to use household laundry bleach with photos! Mix a solution with half water, half Hilex in a tray. Dip part of the photo in and watch the colors change! You can even protect parts of the photo with a wax resist product first if desired, and then dip the entire thing into the tray of bleach solution. See example below. Also see "Dodg" at this link.

tutorial, photos, Guhin
Partially bleached in a tray.
Cutting and rearranging the parts is nothing new, but it IS easy and sometimes the results are striking. I've also previously discussed stretching two similar pictures into one, discarding the most boring strips. (See another example here.)

how-to, photo, art
Of COURSE it works with either
horizontal or vertical strips, even
angled pieces!
Finally, coloring photos the easy way, with markers: Try buffing or smoothing out the streaks with cotton balls. Go for unreal colors and psychedelic effects.
tute, photography, how-to
Markers are just so easy!
Thanks for viewing this post! I appreciate it.


Friday, March 20, 2015

SCRAPING & SCRIBBLING - Fun with Transparencies

I've discussed "bad" photos in this space before. Here's a great way to rid yourself of distracting backgrounds and add some great doodling, which is always fun.

First, I printed out my own, original photograph (below) on transparency film.

Guhin, transparency
LOVE these flowers...Birds of Paradise!

Then I used a scratch tool to scrape away the background, working on the emulsion side.
Next, a fine permanent marker or two (in black), and I really enjoyed this part!
Tips for variations: Try colored markers if you wish, or metallic ones. And try both wide and thin tips!
I mounted mine over white paper, but you could use colored art paper instead...oooo!

photography, transparency, scratch
Note that I left selected elements of the original background, too.

Thanks for viewing this post!


Wednesday, March 26, 2014

PhotoMontage Rainbow!

So colorful! So graphic! So easy that kids can do it!

photography
High-key photograph, black and white.


First, you need a high-contrast black and white photo image.
 
      Load a photocopier with three or four colors of copier paper. Lighter colors work better, but brights are outstanding! 
    tutorial, art book, art lesson
    My beloved Arab stallion, missed greatly.
    • Sandwich the copies together and cut strips either vertically or horizontally (but not both). TIP: Vary the widths of the strips for added interest.  
    • Another TIP: Lay the pieces down in the correct order!
    • Alternate colors as you glue the strips  to a sturdy substrate. (Yes, you'll have enough leftover strips to do this project two or three more times!)      
    art book, P.Guhin
    Do the strips detract from the photo? Maybe, but it's fun!
    Find many more exciting photo-art activities in this new book, pictured below!
    
    Paula Guhin
    Available Here!
    Paula Guhin


    Tuesday, February 4, 2014

    COLLAGE WITH UPCYCLED PAPERS

    Photomontage allows artists to splice together different images to make a statement. 

    Photomontage began as a style of experimental photography in which the photographer makes a work of art by combining several different photographs. Before digital technology, this was often done with scissors and glue. The end result was then photographed and processed to get a seamless image. In modern times this may be easier to accomplish simply by using photo editing software. However, here we'll use the good, old-fashioned collage method!
    collage, make, paper
    Easy collage using scraps of bad photos.

    Here's an easy one, above:
    I cut strips with a paper cutter.
    Vary the widths and lengths 
    for added interest. Arrange
    the pieces on a backing of
    matboard, trying them every
    which way until your composition is pleasing.
    When you glue the pieces down, leave mosaic-like 
    spaces if desired.
    TIP: If you don't care for the color of the matboard, 
    use a ruler and marker to change it!

    create, lesson, tutorial
    Another image from my new photo book!
     The collage above was also done with strips, but without any spaces between them. Too, I added a few short pieces to the top and bottom, and staggered the edges for even more interest.

    The next project, below, is yet another lesson using discarded photo papers. My advice? If you don't have many reject-photos to create this type of collage, make it from magazine or scrapbooking papers.

    PGuhin, tutorial
    I used 3 different photos of the same subject here.
    Note: some edges were torn rather than cut, to better tie in with the subject-matter. My background was an enlargement that seemed boring to me. Before adhering the extra pieces, I used a black marker on their edges for more contrast.

    I think the finished piece is far more successful than the original photos were. 

    Which of the three collages do you prefer, if any?

    All of them (and so many
    more ideas!) appear in 
    this book, below, available

    P.Guhin, Paula Guhintutorials, photos, photography


    Tuesday, April 12, 2011

    Collage/Painting

    This photomontage was hand colored with watercolors and markers in some places on the black and white photos. Then I glued down the photos, an index print, and a few paint color samples, and finally added acrylic paints to help unify the composition.


    Wednesday, August 11, 2010

    Successive Sizes of a Single Image=Impact

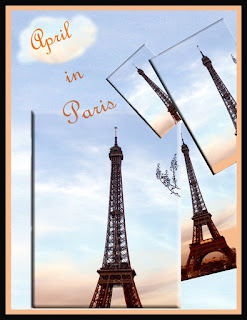
    The example here was done digitally, but the idea works well with photocopies too! Tint each image differently if you wish. Try a number of arrangements until you're happy with the balance, unity, and overall composition.