Friday, March 22, 2013

GIVEAWAY - BLOG CANDY CONTEST - FREEBIE FOR A FOLLOWER!

(This contest is now closed, but there will be others!)
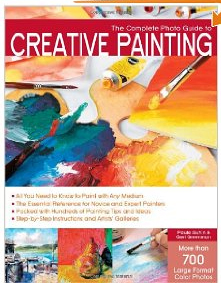
I appreciate my followers and want to reward such loyalty with an art book, brand new, to the one whose name is drawn at random when the contest ends.

This big, beautiful freebie is for a follower of this blog, so if you must sign up now to qualify, please do! It's my hope that you stay with me for future giveaways, too. 
art book, book on painting
This art book includes all the major paint media!


All the usual rules apply: Leave a comment below, at this post. If you win, you must privately send me your postal address within a reasonable time. I will not use the address for any purpose other than to send you the book. I will announce the winner's name in a future post, likely between March 30-April 1, 2013. Thanks in advance for participating!

mixed media art blog

Saturday, March 16, 2013

CREATE A TWO-PART PAINTING!

A 2-in-One Collage/Painting is Cool
MAKE A HUMDINGER WITH HINGES!

Materials:
  • 2 sizes stretched canvas
  • 2 sets hinges
  • screwdriver
  • paints, adhesives, brushes, images, text, art papers, assorted embellishments
  • cupboard handle or knob (optional)
Here's your opportunity to work on FOUR sides 
and create a work of art that can be viewed a number of 
ways! Paint, texture, and collage the backs 
of the canvases, too! Then join the two together 
so that the assemblage can free-stand if so desired. 
But the piece can be wall-hung too!
It's a versatile work. Be sure that wherever you're 
working, front or back, you unify the parts, 
making sure they look good together.
Note the handle on my example, below. 
A knob would have worked too.  
assemblage, tutorial, how-to paint
Viewers can pull the handle and open the 2-canvas piece!
This piece opens to reveal what you can't see 
in the single view here. And the back of the large 
canvas was finished properly, too! 
(I.E., turn the whole thing backwards and 
extend the small canvas, 
and you have a whole 'nother artwork!)


Friday, March 8, 2013

ALTER METAL-LEAF WITH THIS TECHNIQUE


"LEAF" IT TO METALLIC FOIL!  
Want to "foil around" and create an effect to use with paintings, collages, and more?

I used a rub-on sheet of gold leaf, shown below, and patina solution.
metallic foil, antique effect
Gold leaf as rub-on sheets.
tute, how-to, how to
Other patina solutions are available, too!
Caution: the antiquing solution eats through aluminum foil, so use plastic, waxed paper, shelf paper, or layers of old newspapers on your working surface!

In my experiment, I applied the copper metallic surfacer paint to the right side of my gold leaf paper, and the patina green solution directly to the left half.
mixed media, art paper, technique
I prefer the right side, using both the coppery surfacer and the patina product.
 When the coppery paint was still tacky, not dry, I applied the patina solution to that side as well. Both sides were left overnight to dry.

Above is the result. Since it would flake off and perhaps tarnish, I sealed the surface with a spray varnish.


mixed media art blog

blogspot art blog


Saturday, March 2, 2013

THIS TRANSFER TECHNIQUE IS SOOOO EASY!

Make a painting that's also a monoprint.

It's fun, and the results are really cool.

MATERIALS:
    • Paintbrushes
    • Acrylic paint
    • Clear acetate sheet, glossy
    • Polymer medium or soft gel
    • Receiving surface (paper or canvas)

      tute, how to, painting method
      Even a plastic page protector will do!
       
    FIRST, paint the acetate as desired. You can roller some paint onto it, brush the paint on, stamp designs onto it, whatever you like! You can even scratch some of the paint off if you want. Permanent markers can be used, too.
    
    mixed media, transfer
    I used a brayer to apply paint to the plastic, too!
    
    monoprint, method, how-to
    Even the permanent marker will transfer later!
    
    Here I began creating a simple, non-objective design as a background on the plastic sheet.
    NOTE: whatever you paint will be reversed later, so names, words, or most numbers would be backwards in the finished piece.
    THEN let the acrylic paint dry.

    NEXT, brush clear acrylic medium or gel onto the receiving surface. (I used heavy paper.) Before it can dry, lay the acetate, painted side down, onto the wet surface. Smooth it down thoroughly. Let dry overnight.
    
    easy art method, monoprint how-to
    I used matte medium, but the acetate imparted a nice high-shine gloss to the finished painting!
    GENTLY peel the acetate off and you'll be delighted that the paint design has now transferred to the surface.
     Be aware that, as with most types of transfers, bits of the original design may not re-locate. You may wish to repeat the process with new elements and layer them onto the previous, dry design, as I did in the completed work below.
    
    easy art method, simple painting technique
    This finished non-objective painting was done with two layers (using the acetate transfer method twice).

    Thanks for visiting my blog! Please leave a comment if you can.


Saturday, February 23, 2013

COLLAGE PAINTINGS WITH BIRD SYMBOLISM

You see them in the arts and crafts magazines, in ancient art, and as symbolic imagery everywhere. Birds are charming and decorative, but more than that they are richly significant.

The crow is sometimes a symbol of adultery, a fact that I did not know when I created the work shown here. (If you use sparrows in your work, you should know that, traditionally, they have been associated with the dead.) 

painting on canvas, acrylics, mixed media
Town Crier, acrylics, papers, 18 x 24"

A color scheme of red, white, and blue can be very effective with the addition of a variety of values, including black.
mixed media, mixed-media art
Eye See You, Mixed-media on canvas, 12 x 18"

There's something I really like about blues--any blues--combined in a work with browns, tans, or golden colors. It really works for me and for lots of other artists!

These paintings are shown courtesy Stackpole Books and Paula Guhin.

Saturday, February 16, 2013

BE A DRIP! A MIXED-MEDIA EXPLORATION


Here's a great way to intensify a focal area, adding interest to a painting or collage. Experiment with inks, fluid paint, water, and more! 

technique, how-to, how to
Underpainting for the drip technique.


Paint a base, an underpainting, on canvas or paper first. Your palette might be of several colors, with lights, darks, dulls, and/or brights. Markers make a good addition at this time, too. (Waterbased markers will run and add even more fascination!) Let dry.

painting, drip painting, tutorial, tute
The white drips add a high value to the painting.


Prop the canvas or paper at a sloping angle.


Use inks, liquid watercolors, or thinned acrylic paints. Pour them selectively or apply in places with a brush and let drip. 


tutorial, art lesson, non-objective

Next, mix watery paint in another color, value, or intensity, and do more dripping. Here I added a few spatters too! 

Note: you can tilt the canvas any direction you wish, even changing direction as you go. If you have a spritz bottle of water handy, use it to encourage more dripping and dilution as needed. Another helpful tool is a hair dryer, which can alter the flow or slow it down.


technique, tutorial, mixed media
Rework the painting as desired.
Paint out some sections to make them appear less busy, more calm.

If you don't like the painting you've created, use it as the background for a new work. If the unsatisfactory piece is on paper, you can cut or tear it apart and use the best pieces in a collage! 

Yes, chance plays a part in the dripping technique, but it adds 
emphasis and appeal.

art blog


mixed media, art blog

Sunday, February 10, 2013

MAKE A "HOUSE" ASSEMBLAGE WITH HUMOR!

HOUSE WORK: REMODELED HOMES

A HOW-TO ON CREATING AN ALTERED ART ASSEMBLAGE 

assemblage
Abide in Me, by P. Guhin
"House" and "home" are powerful words and potent symbols. They represent shelter and family, as well as a receptacle for connections. They are icons of domesticity, which we typically link with traditional values and with thoughts of our relatives. A home offers privacy, relief, and comfort. It's indelibly associated with childhood, marriage, and motherhood. This is all about the transformations I perform, making artistic statements, often with humor.
altered art
The Perfect Couple


Choosing a Home
The little, dimensional houses I find in thrift shops or secondhand stores always enchant me. These small home décor items pluck at my heartstrings. Some houses are wooden, others pasteboard, still others resin. It's easy to remodel them, while ceramic houses can be very challenging. I also like actual birdhouses, and I snap them up if they're replicas of "people" houses. Old cuckoo clocks would work well, but there is a scarcity of them. Of course you can build your own little house from foam core, cardboard, or wood. Craft stores and art suppliers sell mini houses, too.
MATERIALS
Mini house
Small figures (human and animal) to alter      
Small hand saw or other cutting tool    
construction, found objects
It's fun to match just the right head and body!
Scissors
Paintbrushes
Acrylic paints and mediums
Adhesive of choice (flexible modeling paste, heavy gel medium, etc.)
Decorative and found papers
Fabrics and trim
Sandpaper, file, or rasp
Embellishments (optional)
House Beautiful
1. Cut a good-sized door in the front of the house, if necessary, or remove the front piece entirely. Sand rough edges as needed.
2. Decide: Will the finished piece be free-standing or will it hang on a wall--or both? Attach a base or a hanger to the back if you wish.
3. Decorate the inside walls and floor as you wish. Enhance the outside of the house as desired with paint, papers, fabrics, and found objects. Draw, stamp, or write on the piece, and indicate shingles, windows, shutters, bricks and more if you prefer. Be mindful of color harmony so that a pleasing scheme develops.
mixed media, tute, tutorial
Notes:
1. Select the house you will alter before you choose figures for it, to be assured of a good fit.
2. Craft supply shops have wee dollhouse furniture, and you can sometimes find tiny chairs at thrift stores, too.
    Habitat for Human or Animal
    1. I like to acquire tiny figurines at thrift shops, especially if they're made of plastic, resin or a composition material that I can modify. Again, hard ceramic is not so easily transformed. Wedding cake toppers and small toy figures are excellent choices.
    2. Alter the figure or figures meant to "live" in the abode. Change out heads, add a hat, mask, or different ears, or place an object in a hand.
    3. Allow the adhesive you've used (to join parts) to cure thoroughly before painting it to blend in. Antique the figure with a wash of thin umber acrylic, especially if the face and clothing are much too bright for your taste. Let dry.
    4. Affix the inhabitant(s) inside or alongside the home, using a strong adhesive.
    5. Seal everything, inside and out, with a UV-protectant varnish.

    by Paula Guhin
    He's in the Doghouse Now!
    assemblage advice, tips
    There's a Fox in the Hen-house!
    create altered art
    Consider creating a neighborhood on a single base.


    I make "house plans" when I visit the secondhand shops, and then I do my "home" work!                                                                                            
    Paula Guhin