Showing posts with label unique. Show all posts

Friday, October 18, 2013

YOU, TOO, CAN BE WARPED! A TECHNIQUE FOR CREATING UNIQUE PHOTOCOPIES

I am very excited about this fun post! (This is nothing new, since I become excited about many things frequently.)

The November '13 issue of Arts & Activities Magazine includes my piece about using either Xerography or Scanography with your own images to distort them. 

unique method, how to
A & A is a great magazine for educators!


For example, this photograph was ideal for experimentation to stretch it out. 
Paula Guhin
Dark figure on a lighter background.

Then, if you used a black & white copier,  you have the great fun of hand-coloring the prints! Soft pastels, oil pastels, pens, or good colored pencils are the best tools of choice.

Paula Guhin
Keep your eyes closed!


As you can see, the article includes how to make portraits from life, and they can also be distorted or blurred creatively.  Of course you can place objects on the scanbed, too.

The finished creations can be framed and displayed, or you can use them in mixed media paintings and collages. I had so much fun exploring these techniques than I ended up with many extra copies, and they won't go to waste!

The ARTS & ACTIVITIES website, bless their hearts,  has a bonus feature here for anyone with concerns about using photocopiers. Just scroll down the page to find it.

                                                      Paula Guhin

Monday, October 1, 2012

EASY HALLOWEEN CRAFT, COOL COSTUME IDEA!

Get an old pair of sunnies at the thrift shop, and a bag of plastic creepy-crawlies at the dollar store, and make a c-OOOO-l pair of shades for cheap!
altered art, holiday fun
This is altered art at its most fashionable!


I used a hot-glue gun and finished this project in no time.
assemblage, easy holiday project
For this spooky project, try worms or snakes, too!


Monday, September 10, 2012

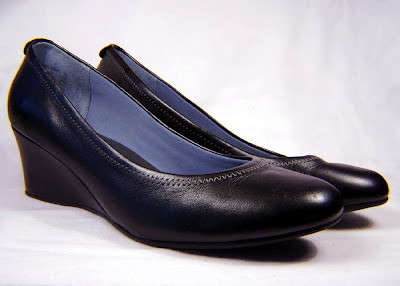
A HOW-TO PROJECT: CREATE ALTERED SHOES

Even a shoe (or two) can become a blank canvas--create cool kicks that you can actually wear, if you dare. Then step out in style! This lesson will show you how to make art from a pair of old shoes. Paint, collage, and embellish them to your heart's content!

MATERIALS: 
  1. Smooth leather shoes (Note: Canvas shoes work, too!) 
  2. Gesso and acrylic paints (including paint writers) and paint brushes
  3. Enhancements as desired (sequins, coins, lace, imagery, etc.)

altered art, how-to
I like a wedge heel: more surface to decorate!

METHOD: 

1. I love to give thrift shop shoes a new life. First clean them, let dry, and gesso them. Use two coats if necessary, drying between coats. (Lightly sand smooth if preferred.)

2. When the gesso is dry, paint with acrylics. If you don't want to paint          freehand, preferring shapes to fill in, 
first draw outlined shapes with dimensional paint-writers. When dry, the lines form borders to hold each color in its place.  
technique, upcycle shoes, decorate shoes, alter a shoe
Squeeze-paint is an easy way to keep painted shapes neat.


3  Incorporate printed words or pictures,   your initials, charms, crystals and other small, flat objects.   When the adhesive is dry, seal with clear acrylic.
altered art, how to, painted shoes
A pair of unwanted shoes become works of art!


Tuesday, December 28, 2010

Fabulous Foil Technique!

This tutorial is all about using kitchen foil (heavy duty is best but not absolutely necessary) to create a heavily textured artwork.
  1. Stretch a large piece loosely around a base of foam-core. Wrap it around the edges. Note: Some artists apply glue here and there to hold the foil in place better. I've not found it necessary, except to secure the excess foil at the back.
  2. Use your fingers, a pencil eraser, or a shaper tool to form ridges, lines, shapes, etc. in the foil. Pinch and wrinkle at will, leaving some areas flat for variety and contrast.
  3. Consider pressing in drawings of symbols, words, or numbers, too. See the little hand? See the ancient sun symbol?


4. Try various mediums, acrylics, inks--anything that will stick to the foil. Antique the piece so the depressions have shadows, and brush highlights over the top edges if you wish.

Wednesday, December 1, 2010

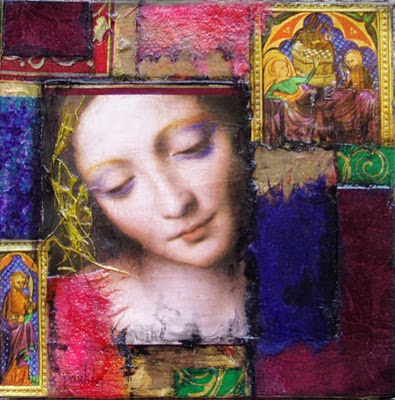
Christmas Art! A Collage to Wish You Happy Holidays.

mixed media, collage
This 6" x 6" wraparound artwork can be wall-hung or placed on a tabletop easel. I used art papers, ink, and several acrylic mediums (in addition to the images, of course).
It was fast and easy to make. If you create something similar, consider a gallery-wrapped canvas. Tear or cut your papers first and arrange them without gluing, to check your composition. Then adhere them, and to the sides,too, and let dry. Add ink, crayon, or pen lines, etc., and let dry again. Finally, varnish the piece to protect it. Send me your own examples of this tute if you like...I would love to see them!