Showing posts with label construction. Show all posts

Tuesday, December 3, 2019

ASSEMBLAGE, FOUND ART OBJECTS, SCULPTURE, STEP-BY-STEP

I've been a fan of myths and legends since I was a child. Medusa, especially, caught my fancy.
She was a Gorgon, but before that she was a beauty. Raped by Poseidon, cursed by Athena, she was said to have wings. One of her sons was the winged Pegasus.
I always have a concept in mind before I begin.
I also prefer to build upon a structure or support.
Below I've pictured a few of the materials I
gathered ahead of time. Didn't use them all!
 
The costume pin reminded me of snakes!
I often change my plans as I go. Materials not shown are an old rubber ball and a metal ball-chain necklace that "fancied up" the edges later. Of course I also used paints (acrylics) & adhesives.
I cut the doll's rubber "hair" off and
affixed the ball to the face, to serve
as forehead and top of head. When
dry & secure, I punched holes in the
"scalp" and glued in the toy snakes.
The baby-doll face was waaaay too
cute, so I created her unsightly nose
and mouth from molding paste.
I adhered the lovely face image looking down at Medusa, and placed her in a bubble of glass (slightly domed, from a small picture frame).
 Below is a detail of the topmost part. Note the blue eyes on either side of the "turned-to-stone" figure--because, you know, MEDUSA!
The horse's wings came from a composite angel.

Another close-up, below, of the 2 key-chain "snakes."  
On the two outer sides, I made marks: ancient Greek symbols.
They seemed too obvious until I partially obscured them.

This "junk art" can be either a tabletop piece or wall-hung.     
Most of the materials were either discards or thrift-shop finds.
  
In need of more assemblage art inspiration? There are many more examples on this site.


Saturday, August 29, 2015

USE YOUR ORIGINAL DECORATIVE PAPER TO MAKE ENVELOPES

MAKE YOUR OWN CLASSY ENVELOPES!
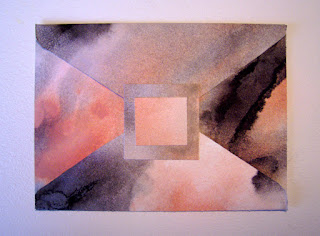
I love experimenting with techniques, and of course I keep all the examples that I like. Those painted papers are great for original, unique envelopes.

how-to
Supplies include a bone folder and glue.


You'll find a pattern in the book, Creating Decorative Paper. A cutting mat is handy in addition to the tools and materials pictured above.

A good set of dimensions might be 4" x 5.5" finished. So you'll need a decorative sheet of paper about 10" x 13". The pattern includes four flaps surrounding the smaller rectangle. You could use an old envelope as your pattern.

Score the paper using the bone folder. Run it along the ruler edge where the flaps will fold. If your paper is too dark to write on later, glue in a white or light-colored insert where the message will go.

how-to, arts-and-crafts
Scoring to create clean folds.
 If the other side of the envelope (where you address it) is dark, paint the return address area and the address area with white gesso or light-colored paint.
When you're ready to mail the envelope, glue on a small
rectangle of painted paper to seal, or use a store-bought
sticker.
Guhin, art, project
White areas for addresses.
tutorial, tute, art-activity
A back side, ready to go!


Saturday, May 31, 2014

CIRCUS CLOWN ASSEMBLAGE

Found objects include doll parts, rubber balls, and felt stars.

found objects, altered art
The "happy" side, a close-up of the assemblage.

   The sad side, below. This was a hoot to make!
P.Guhin
The feet of this assemblage are doll shoes!


assemblage, art doll
I blended the joint with acrylic paint so they'd match up better.

Can you think of a good title for this work?
Something about being two-faced
seems a bit too obvious to me.
 
Thanks for viewing this post!   


Sunday, May 11, 2014

Three Assemblages with Found Objects & Recycled Materials

sculpture, project
I used doll hands for his gloves.
I want to preserve the earth's resources as much as you do, and (like you) I try to save money and re-use things. These three sculptures may not be your cup of tea, but they're each different and I hope you find them interesting!

The first is a papier mache superhero. Doesn't he
look like he knows what he's doing? His bandy legs
make me laugh.
When the paste was dry, I painted him with acrylics
and then collaged on a few bright magazine pieces.
I sealed the piece with acrylic medium.
 
The next altered art sculpture is terribly weird!        
An old duck decoy, some plastic dinosaur legs,
a doll head, and part of a toy with wheels.
P. Guhin, sculpture
Hell On Wheels, by Paula Guhin


The last assemblage or altered art sculpture today is simply a plastic
 jug, cut and reassembled with other plastic jug parts added.
P. Guhin, sculpture
An altered art project that's easy to make.


Guhin


Sunday, March 23, 2014

Sculptural Art on a Hippie Van!

The Ultimate in Upcycling!

  I took these photos over a decade ago in Colorado. The artist is unknown, but his (or her) vehicle was fantastic!

found objects
What a great way to use discarded mannikins!


Those artists who create assemblages use found objects, and this work of art qualifies for that title, I believe. I only wish I had some longer shots to show you, too.

 
altered art, assemblage

Sculpture on a vehicle! Photo copyright Paula Guhin.

Thanks for viewing this post!
It's not my usual mixed-media subject, but hope you like it.


Saturday, February 1, 2014

ALTERED ART PROJECTS CREATED OF FOUND OBJECTS

 ASSEMBLAGE IS FUN & EASY! 
Your art materials can include such throwaway items as doll parts, wood scraps, broken toys, and so much more.
Here. just half of an old, damaged globe was used as the basis for a social statement in the round, so to speak.
altered, construction
Firecrackers helped emphasize the theme.
Here's another view of the same sculpture. 
mixed-media, sculpture, found objects
Toy money, caution tape, small toys, acrylic media.


Next up, a ceramic teapot (upended) served as the basis for a sculpture. 
P. Guhin, altered, assemblage
So simple to make!

The mouth? Halloween "teeth."


Finally, a rustic assemblage of old pieces of wood.
Primitive, yes, but striking as a wall-hanging.
art, activity, frugal
The "head" is a recycled heat gage.

art blog, mixed-media


Friday, November 29, 2013

Altered Havens: Shadowboxes and Shrines

 Places of the Heart/Art

Altered art is an umbrella term referring to the transformation of
ordinary, everyday objects into artistic pieces.

Assemblage is the art of constructing a cohesive, sculptural piece from a variety of materials (especially found objects). Diane Maurer-Mathison refers to it as "three-dimensional collage." As a form of freestyle sculpture, it might also be labeled Reconstruction. The parts, most of which are not intended as art materials, are predominantly brought together rather than
painted, drawn, modeled, or carved.
You dismantle things and recombine the pieces in new ways. Thusly you are remaking the meanings of the objects used. It's a way to give new purpose and a second life to castoffs.

found objects, spirit house
Top of my shrine to Ganesh, a Hindu god.


Here's my tutorial, below, on how to create an altered art assemblage,    
be it an altar or shrine or spirit house.  
(Spirit houses are shrines to the protective spirit of a place. Shrines are receptacles for revered artifacts both sacred and secular. They make a visual statement filled with meaning. They can have to do with family, nature, personal growth, healing, protection--their significance is chosen by the creators of the shrines. Shrines can be commemorative, inspirational, meditative, or empowering in some other life-enhancing way, and each one can be made aesthetically appealing.
Like shrines, home altars are places of contemplation and personal devotion. The construction of personal altars is an ancient art--for some, they are holy places, sacred spaces. They have served the spiritual for thousands of years, providing a hub for linking up with one's inner self.)

how to, assemblage
Close-up of the bottom portion of Ganesh, by P. Guhin

TO BEGIN:
       1.     Will the shrine or altar be miniature temple of sorts, a personal space for reflection, a reminder of what you're thankful for, a celebration of an event, perhaps? Or is it to be a memorial to honor someone or something? Your objective might be simply to creatively and freely express yourself.
Tip: The finished piece need not strictly adhere to your original plan.

   2.  There's no single, "right" way to begin such an assemblage, but you could start with a sturdy vessel or a strong framework. Choose a shadowbox, base, deep picture frame, or other receptacle for its good craftsmanship and stability. Bear in mind its size, form, and structure as they relate to your needs. A junked medicine cabinet, desk drawer, wooden box, or old clock case could house the key elements. Other ideas for a reliquary are a vintage train case, a metal cash box, or the shell of an old bathroom scale. Of course this foundation will be transformed as you work, but it is the core of your piece

3. Collect materials and play with their potential. Bring together memorabilia, talismans, and other symbolic objects, including charms and trinkets. Do you have any fetish objects? (A fetish is an inanimate object loved for its supposed magical powers or because it is considered to be inhabited by a spirit. It is believed to protect or aid its owner.)
Similarly, a totem is also a venerated symbol; a plant, natural object or animal believed by a person or a society to have spiritual significance.

Mindfully gather such meaningful objects as special stones or feathers, seashells, bones, horns, crystals, a figurine. Also assemble pictures, papers, decorative elements, and more. Consider their colors and textures--rich textures, visual or actual, add appeal to an artwork. Soon an idea will gel or a theme will come to mind and you can move forward.

P.Guhin, shrine, altar
Ganesh15" tall, 6" wide, 3.5" deep

4. Cover the work area first. One way to begin is to paint, collage, or embellish the vessel as you wish, before inserting and adhering major parts. (Another method is to assemble the entire piece first, and then paint it, or dispense with the paint altogether!) Be prepared to change your mind as you audition the various components.

Decide whether the assemblage will be grounded or suspended from a wall or both. Add feet if desired, using thread spools, wooden blocks, flat pebbles, or furniture legs. Consider attaching a hanging system. Decorate any unfinished areas (top, sides, back) as desired, making adjustments throughout the process.

More altars and spirit houses: 
See Freedom Flight, with real bird wings, at this link: Shrine,
and a shrine to my mom at Memorial to Ida
P.Guhin

Friday, November 1, 2013

KIDS DRIVING YOU BUGGY? Try an art project with them: CREATE INSECTS !

BUGS ON A BUDGET

PAPIER MACHE FUN FOR STUDENTS  

We made bargain bugs, and you can, too: inexpensive insect-sculptures using papier-mâché. Did I mention this was done with high-schoolers? I know, I know, often papier- mâché is reserved for the lower grades. But even older students really get into it, creating not only incredible insects but also cool crustaceans, super spiders, and more.  

how to, create bugs
See the how-to instructions below!
MATERIALS
  • Reference books on insects
  • Newspapers and string
  • Masking tape
  • Wire and pliers or wirecutters
  • Wallpaper paste and containers
  • Brown paper
  • Acrylic paint (or tempera)
  • Paint brushes
  • Buttons, toothpicks, and other extras
  • Glue gun and glue
construction, mixed media
This project is easy but soooo cool!
BEGINNING THE PROJECT
I loaded up on picture-books of creepy-crawlies, although a computer search could have yielded plenty of images as well. For my demo, I began with several bundles of balled-up newspaper tied with string,  insisting that armatures involve more than one body segment. In other words, I would not accept simple snakes and such.
Next, I joined two or three bundles together with masking tape. (Careful here--some kids will use waaay more tape than necessary!) Then I poked coat hanger wire through the body to create several pairs of legs. The kids could add wire pincers and antennae too. I anchored the wire appendages to the body with a little tape, so they'd stay put.
art teacher, Paula Guhin
Make your own creepy-crawlies with this art activity.


PROGRESSING TO 
PAPIER-MÂCHÉ
When the kids had built their armatures, they applied torn newspaper strips dipped in wallpaper paste. I suggested three layers and reminded them that I expected good craftsmanship. Evaluation would be partially based on sturdiness and a smooth appearance. A final coat of smallish brown paper pieces was allowed to dry thoroughly before we proceeded.
We painted the creatures with acrylics, although tempera would do. If you use the latter, try mixing it with white glue for a nicer, less-matte finish. When the paint was dry, we added enhancements such as eyes, whiskers, or "feelers."  (A golf tee makes a great stinger!) We used a glue gun to attach such extras as eyes, filmy wings, and more.
papier mache, sculpture
Crustaceans are cool, too!
Try creating fantasy or composite creatures if you prefer.  Think about hanging the sculptures from the ceiling with fishing line to display them.
Paula Guhin, mixedmediamanic


Saturday, March 16, 2013

CREATE A TWO-PART PAINTING!

A 2-in-One Collage/Painting is Cool
MAKE A HUMDINGER WITH HINGES!

Materials:
  • 2 sizes stretched canvas
  • 2 sets hinges
  • screwdriver
  • paints, adhesives, brushes, images, text, art papers, assorted embellishments
  • cupboard handle or knob (optional)
Here's your opportunity to work on FOUR sides 
and create a work of art that can be viewed a number of 
ways! Paint, texture, and collage the backs 
of the canvases, too! Then join the two together 
so that the assemblage can free-stand if so desired. 
But the piece can be wall-hung too!
It's a versatile work. Be sure that wherever you're 
working, front or back, you unify the parts, 
making sure they look good together.
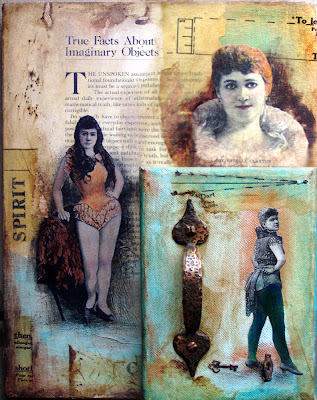
Note the handle on my example, below. 
A knob would have worked too.  
assemblage, tutorial, how-to paint
Viewers can pull the handle and open the 2-canvas piece!
This piece opens to reveal what you can't see 
in the single view here. And the back of the large 
canvas was finished properly, too! 
(I.E., turn the whole thing backwards and 
extend the small canvas, 
and you have a whole 'nother artwork!)


Sunday, February 10, 2013

MAKE A "HOUSE" ASSEMBLAGE WITH HUMOR!

HOUSE WORK: REMODELED HOMES

A HOW-TO ON CREATING AN ALTERED ART ASSEMBLAGE 

assemblage
Abide in Me, by P. Guhin
"House" and "home" are powerful words and potent symbols. They represent shelter and family, as well as a receptacle for connections. They are icons of domesticity, which we typically link with traditional values and with thoughts of our relatives. A home offers privacy, relief, and comfort. It's indelibly associated with childhood, marriage, and motherhood. This is all about the transformations I perform, making artistic statements, often with humor.
altered art
The Perfect Couple


Choosing a Home
The little, dimensional houses I find in thrift shops or secondhand stores always enchant me. These small home décor items pluck at my heartstrings. Some houses are wooden, others pasteboard, still others resin. It's easy to remodel them, while ceramic houses can be very challenging. I also like actual birdhouses, and I snap them up if they're replicas of "people" houses. Old cuckoo clocks would work well, but there is a scarcity of them. Of course you can build your own little house from foam core, cardboard, or wood. Craft stores and art suppliers sell mini houses, too.
MATERIALS
Mini house
Small figures (human and animal) to alter      
Small hand saw or other cutting tool    
construction, found objects
It's fun to match just the right head and body!
Scissors
Paintbrushes
Acrylic paints and mediums
Adhesive of choice (flexible modeling paste, heavy gel medium, etc.)
Decorative and found papers
Fabrics and trim
Sandpaper, file, or rasp
Embellishments (optional)
House Beautiful
1. Cut a good-sized door in the front of the house, if necessary, or remove the front piece entirely. Sand rough edges as needed.
2. Decide: Will the finished piece be free-standing or will it hang on a wall--or both? Attach a base or a hanger to the back if you wish.
3. Decorate the inside walls and floor as you wish. Enhance the outside of the house as desired with paint, papers, fabrics, and found objects. Draw, stamp, or write on the piece, and indicate shingles, windows, shutters, bricks and more if you prefer. Be mindful of color harmony so that a pleasing scheme develops.
mixed media, tute, tutorial
Notes:
1. Select the house you will alter before you choose figures for it, to be assured of a good fit.
2. Craft supply shops have wee dollhouse furniture, and you can sometimes find tiny chairs at thrift stores, too.
    Habitat for Human or Animal
    1. I like to acquire tiny figurines at thrift shops, especially if they're made of plastic, resin or a composition material that I can modify. Again, hard ceramic is not so easily transformed. Wedding cake toppers and small toy figures are excellent choices.
    2. Alter the figure or figures meant to "live" in the abode. Change out heads, add a hat, mask, or different ears, or place an object in a hand.
    3. Allow the adhesive you've used (to join parts) to cure thoroughly before painting it to blend in. Antique the figure with a wash of thin umber acrylic, especially if the face and clothing are much too bright for your taste. Let dry.
    4. Affix the inhabitant(s) inside or alongside the home, using a strong adhesive.
    5. Seal everything, inside and out, with a UV-protectant varnish.

    by Paula Guhin
    He's in the Doghouse Now!
    assemblage advice, tips
    There's a Fox in the Hen-house!
    create altered art
    Consider creating a neighborhood on a single base.


    I make "house plans" when I visit the secondhand shops, and then I do my "home" work!                                                                                            
    Paula Guhin