Sunday, July 27, 2014

PROPORTIONS OF THE FACE - A Guide for the Novice

  1. First, draw an egg shape. The chin portion should be more narrow than the crown.
  2. Believe it or not, the eyes must be placed nearly halfway down! (Especially if you're drawing a young person.)
                                         how-to, tutorial, tute
3. In the lower half of the face, divide the space into thirds (with the bottom of the chin being the bottom of the final third). The bottom of the nose is at the bottom of the first third, and the bottom of the lower lip as at the bottom of the second third. These are only approximate proportions, of course.
 
4. The ears in the front view should not protrude too far. The top ear tip is about at the eyebrow, and the bottom of the ear lobe is about even with the bottom of the nose.
 
5. Don't forget to add a neck, and not too thin, either!
 
Finally, add lots of strokes for the hair. TIP: Youngsters often begin the hairline too low on the forehead. Don't do that!


Monday, July 21, 2014

SOFT PASTELS ON GESSO-BOARD

The board I used had enough "tooth" to grab the pastel pigment easily. I chose to create a simplified tree-scape.

P.Guhin, tutorial
Rembrandt brand pastels are the best!
I used harmonious colors to draw in the shapes formed by the negative space (the background). Then I began to fill in the shapes.

Note in the finished work, below, that the brightest colors are balanced out with more neutral ones. Also notice that there is a sense of equilibrium.
P.Guhin
TIP: Use a variety of values from dark to light!


P. Guhin

Thursday, July 17, 2014

WINNER ANNOUNCED, AND BLASTS FROM THE PAST!


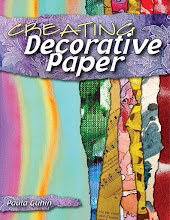
The name chosen from the hat (actually a bowl!) to win the free art book, Creating Decorative Paper, was Geri deGruy! My thanks to the others who participated, and I encourage them to please try again...I'm planning another giveaway even as we speak.

One section of that book concerns resists of many types. I've discussed them here before, and love to incorporate them into my mixed media work. Clear tar gel on absorbent paper can produce fantastic results if you let it dry, then wash vivid color over the area.
wash, how-to
Can you see the fish shapes?
 Here's the original post.


Wax resist is another simple, easy method: In the butterfly example below, I used waxed paper. The tutorial is here.

tutorial, method
I adore these colors!


P.Guhin
I used a fabric resist material here.
See the original post!


Thursday, July 10, 2014

BLOG CANDY! FREEBIE! GIVEAWAY!

This contest is my way of thanking those
dear hearts who follow this blog.
 
It's easy to qualify for chance to win a copy of my book, Creating Decorative Paper. It's all about transforming ordinary papers into colorful, creative, and unique art materials!
free+book, free, win, contest
Hundreds of instructions for great art projects!


SIMPLE CONTEST RULES:
    • Be a follower of Mixed Media Manic (and I'll love you forever)
    • Leave a comment (just one will do it!) below this post. If you win, I must have a way of contacting you!
    • A name will be selected in a fair and random drawing, and the winner will be notified in my next post right here at Mixed Media Manic.     
Thanks for your loyalty, and best wishes.
Paula
                       

Thursday, July 3, 2014

A MIXED-MEDIA COLLAGE -- SMALL & SIMPLE

I created this piece awhile back when I was really into using vintage images. It sports some textured paper, acrylic paint, a heart "locket" that's probably not real gold, and yes, I know that hearts have been done to death. (Back then I guess I used it because I had it.)

copyrighted, collage-painting
The text is my message against pedophilia.
I hope your Independence Day holiday is or was a "bang-up" good time!
art+blog